Born Punk is a point-and-click game from Melbourne-based developer Insert Disk 22, and like all point-and-click adventures, the core gameplay loop requires players to solve puzzles to progress. If you’re playing Born Punk and are stuck or simply need a little nudge to get you back on track, our Born Punk walkthrough is here to guide you on your way.
Apartment
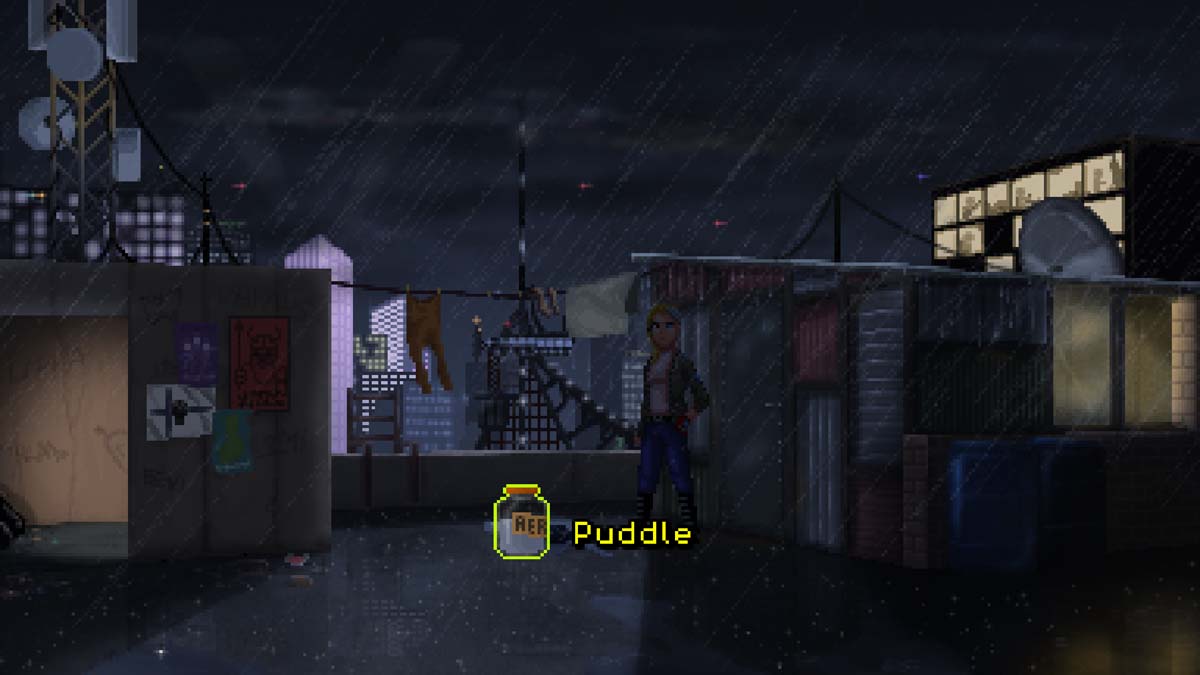
When you gain control of Eevi, check the Shot Glass on the ground in front of you as well as the nearby Vodka Bottle.
There will also be a Longdrink Glass on the windowsill that you should take.
Interact with the Bedsheet Corner dropping southeast of the bed to reveal the Bottle of (Hangover) Pills/Hangover-Delite Bottle.
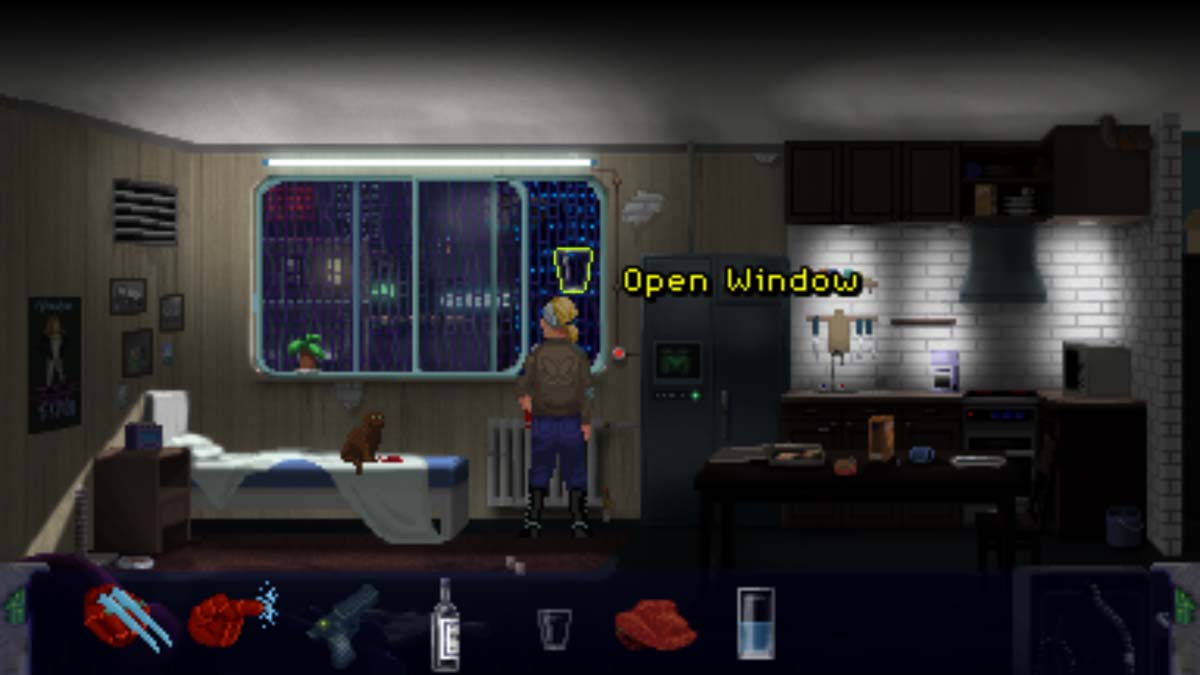
Grab the Towel from the kitchen area to the right of the kitchen sink.
Open the refrigerator and grab the Red Herring inside.
Give the Red Herring to Faxina to get her away from the window.
Use your Shot Glass on the open window to fill it up halfway with water. Combine the Shot Glass with your Longdrink Glass to fill it with water.
To fully fill the glass, take the Longdrink Glass to the bathroom sink on the right part of the room. It will normally fill the glass halfway, but since you have the water from earlier, it will now be a full glass.
Check your inventory and use Eevi’s Cybernetic Claws on the Hangover-Delite Bottle to cut it open.
You can now combine the open Hangover-Delite bottle with the fully filled Longdrink Glass to get the Hangover Cure, which you can now use on Eevi herself. Eevi will now be open to leaving the apartment.
Head for the door and interact with the PA system. When it asks for an override, the answer is “Behind a bar, in an alley”.
Once you leave your apartment, you can close the door behind you if you wish. Head to the stairs going up to the roof to continue.
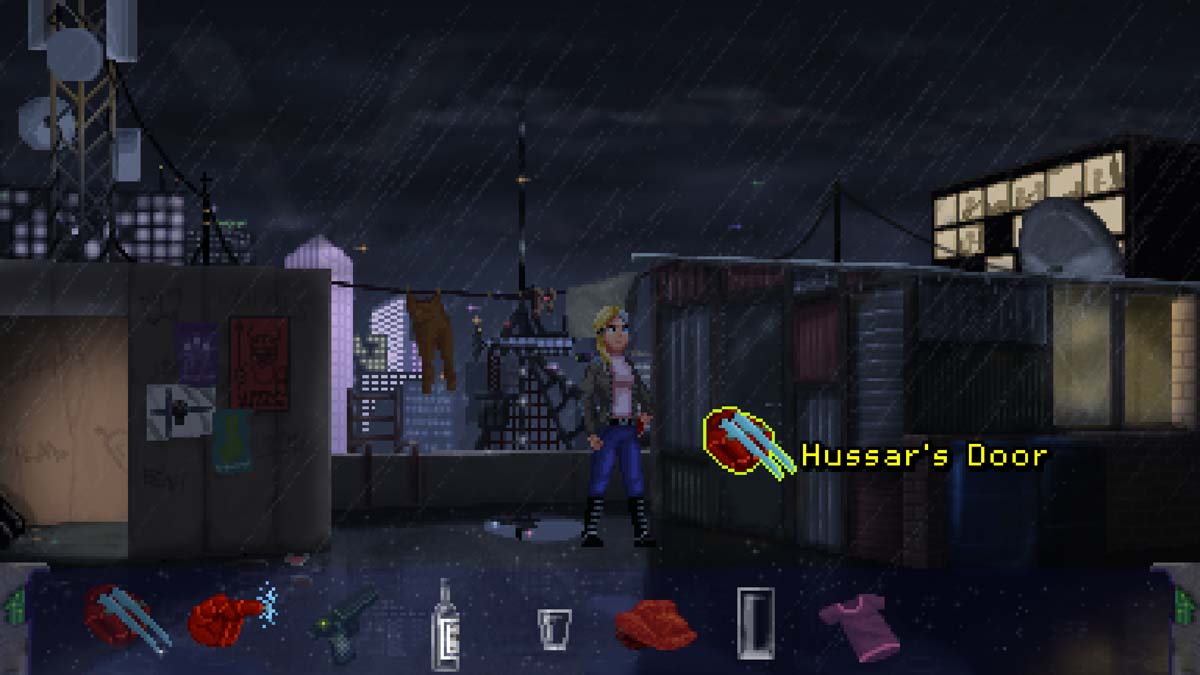
Select the door on the shack to speak to Hussar. She won’t respond, which means the next step is to either keep knocking or use the Cybernetic Claws on the door to get her attention. You can also inspect Hussar’s Clothes next to the shack to take the shirt in the middle.
Hussar will tell you that she would like to drink whatever they had last night. After the conversation, leave the rooftop and head down the stairs to go to the bar.
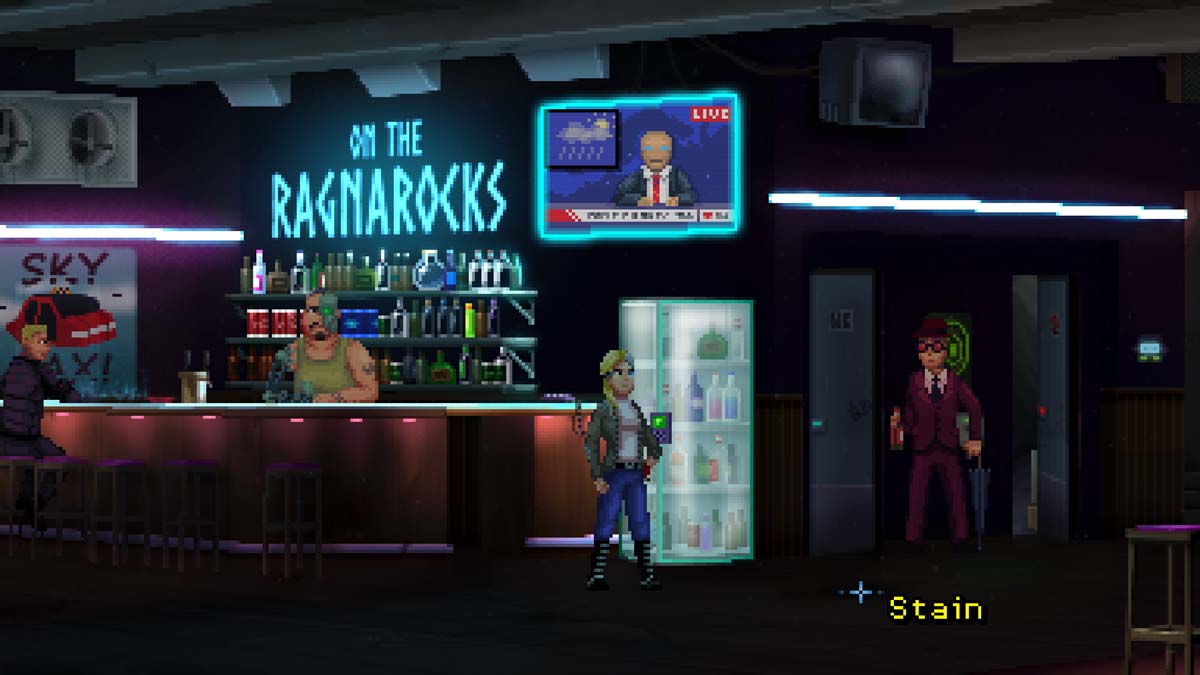
Bar
When you arrive, head to the left and speak with Harald. He will ask for his vodka back (the empty vodka bottle you picked up earlier). You can either tell him the truth about the vodka and get started, or lie to him and say you will get the vodka bottle.
If you choose to lie to Harald and say that you have the vodka bottle, you can go back to Hussar’s shack and fill the Empty Vodka Bottle with the puddle below Hussar’s clothes. Telling the truth allows you to proceed, with just some admonishment for Eevi.
Regardless of how you resolve the situation, ask Harald what Hussar was drinking last night and pay attention to the drink clues that he gives you. Speak to Harald about the water being cut off to learn that you need to power a generator in the maintenance room with bio-waste, which you can get from the bathroom (W.C.).
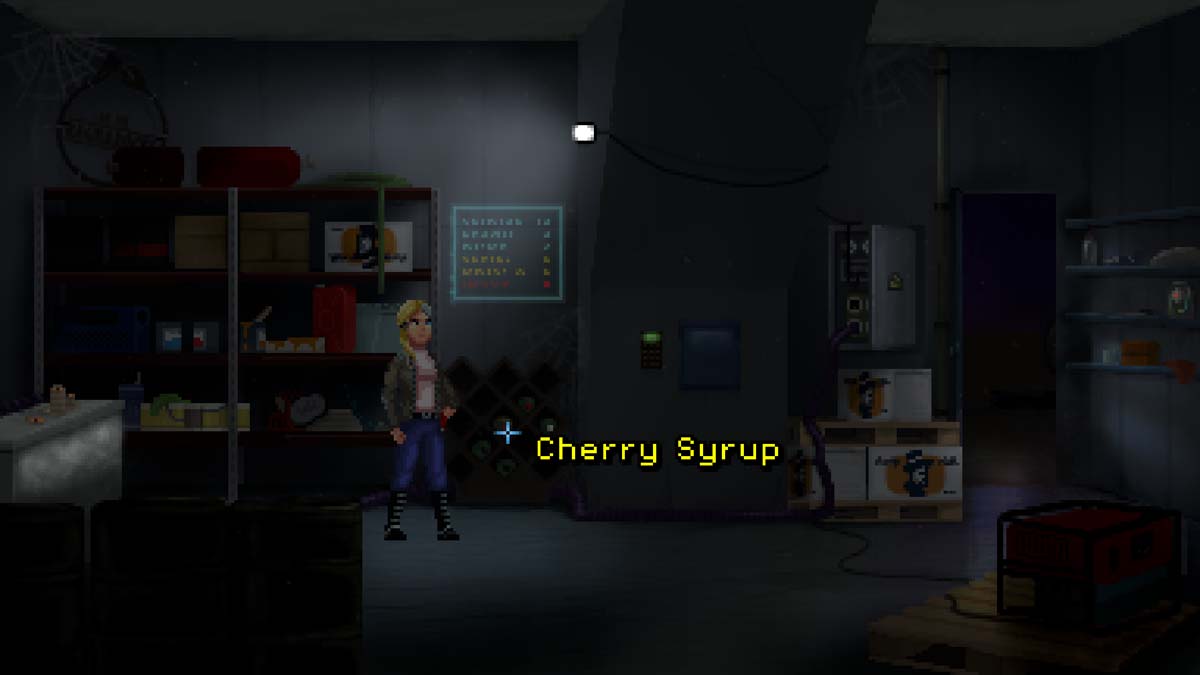
Go into the maintenance room (the door that is slightly ajar) and search the plastic gloves xox on the right side to get some Plastic Gloves. Check the freezer on the left and examine the stack of coasters to get a Coaster.
There will be a wine rack to the right of the freezer. Move your mouse until you find a bottle that says Cherry Syrup. Examine it to identify it as a drink that you might have used last night, and then you will be able to pick it up. If you don’t examine it first, you won’t be able to take it.
Examine the keypad in the middle of the room to try and unlock it. Eevi will read out the wrong code; you can click outside of the keypad to leave. Talk to Harald and ask him about the code to get ∑37 as your hint.
The hint means that your 6 numbers must add up to 37 in some way. Any combination works, such as 999334, 666667, or 987643. The numbers you put in and the order doesn’t matter; you only need to make sure the six numbers used add up to 37. Alternatively, you can get the code wrong repeatedly and get locked out, then use your Hacking Tool on the keypad to open the safe as well.
Regardless of how you open the safe, use the keypad to open the generator and grab the Empty Fuel Cartridge/Empty Bio-Waste Cartridge inside.
Leave the maintenance room and visit the bathroom to the left. Once inside, check the Reservoir in the bottom left side of the room and use the Empty Bio-Waste Cartridge on the open Reservoir. You will be asked to use something to protect your hands. If you picked them up, your options are:
- Plastic Gloves
- Hussar’s Clothes
- Kitchen Towel
Once you have the filled cartridge, return to the Maintenance Room and put the cartridge back in the generator. This will power the Access Panel on the Security Fridge, letting you access the drinks. You need three bottles, but you can’t take them all. If you take the wrong drink, you will have to put all drinks on hand back into the fridge and start again.
Before you check the fridge, there will be a stain on the carpet, at the bottom right area of the Security fridge. Examining it will be necessary for confirming one of the drinks.
The three drinks you want are:
- Space Elevator Bitter
- White and Red Eagle Vodka
- Honeyberry Finn Liquor (if you didn’t examine the stain earlier, you can’t get this)
Once you have all three drinks, talk to Harald and ask to use the bar shaker. He will refuse, and you will have to mix the drink yourself. Just move any of the four bottles (Cherry Syrup, Space Elevator Bitter, White and Red Eagle Vodka, Honeyberry Finn Liquor) to the Longdrink glass, and Eevi will automatically mix up the Drink for Hussar.
Return to Hussar at the apartment rooftop and interact with the shack door to give her the drink. This will transition you to an office, a day before current events.
Office
When you regain control of Mariposa, check your shelf to find a Thick Rectangular Thing. Examine it first to find out that it is an Encyclopedia, which is automatically added to your inventory.
Check your inventory and use the Encyclopedia on yourself to rename everything properly and give yourself more information. Your objective now is to learn more about your host.
Start by checking the bookshelf near the computer desk to find some books that you need. Search the middle shelf and examine the C.A.T.S. Book, then interact with it to absorb the knowledge. Check the top shelf and look for the Santeria and Orisha book. Examine it, then interact with it to absorb its knowledge.
Head to the middle of the room and grab the Key on the table, to the right of the Bowl of Grapes.
Head to the right side of the room and check the bottom right area to find a Drawer. Use the Key on the Drawer (not the Dresser which is right below it) to get the Diary. Use the Diary on yourself.

After the scene, move to the left side of the room and check the bottom shelf of the bookshelf. Examine the Computer Manual to learn what it is, then interact with it to add it to your inventory. Use the Computer Manual on yourself to absorb the knowledge.
After reading the manual, take the Cable that has fallen off the table (check the bottom left part of the area).
Use the Cable on the Computer Screen, and you will finish the adventure. You will then switch to Grandmaster Flashdrive.
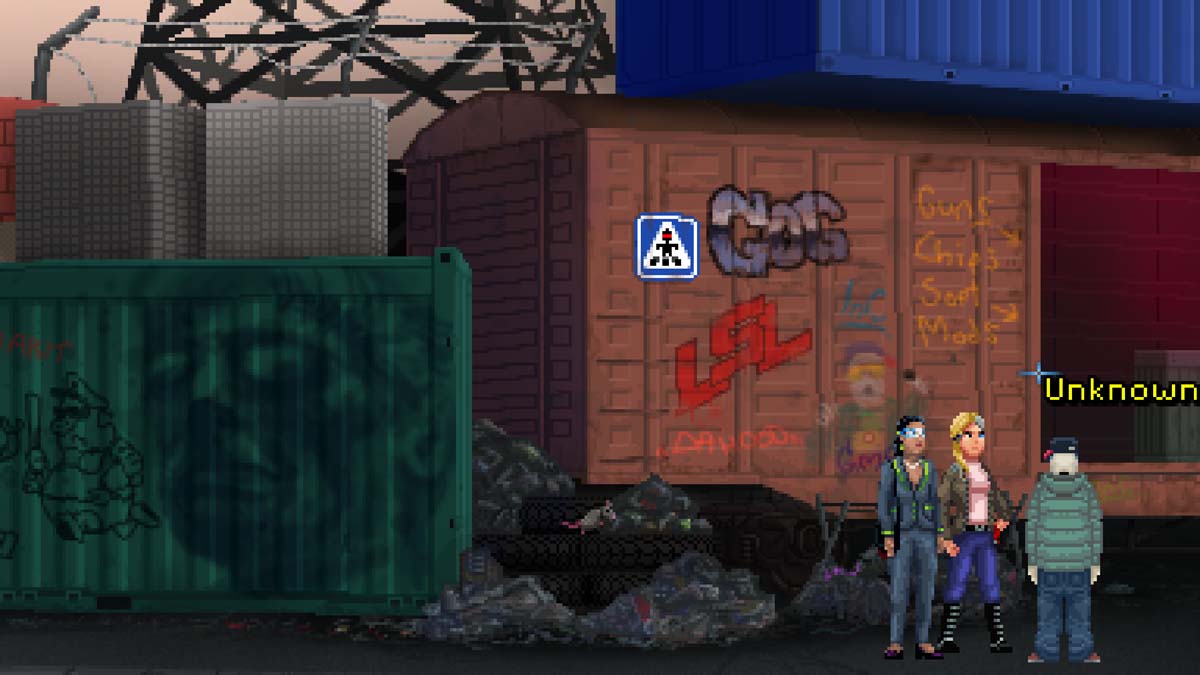
Streets
When you regain control, head right and examine the Trash Bin, then interact with it to get the Broken Drone and the Broken Drone Wing.
Investigate the Trash to the bottom left of Thunder Yanovich’s position. Examine the pile, then interact with it to get a Plastic Bag.
Search the Gully Cover to the right of the Trash Bin to get the Dead Rat.
Move to the right side of the area, going past Jeff’s Nightclub. Examine the Ashtray to the right of the entrance, and then interact with it to take the Old Glue item.
The Glue cannot be used on its own, and it must be heated up. Head back to Thunder Lanovich and you will see Steam pouring out to his left. Use the Old Glue with the Steam to make it usable, then use the Old Glue on either the Broken Drone or the Broken Drone Wing to get the Fixed Drone.
It has no power and cannot be used on its own. Head to the right of Jeff’s Nightclub to find a Street Lamp Pole. There will be an Electric Box you can examine, then interact with to unlock the option of charging your drone. But you cannot charge the drone without anything to connect it to.
Head to an alleyway between the medical clinic and Jeff’s Nightclub. Under the monitor, there is a Wire that you can take.
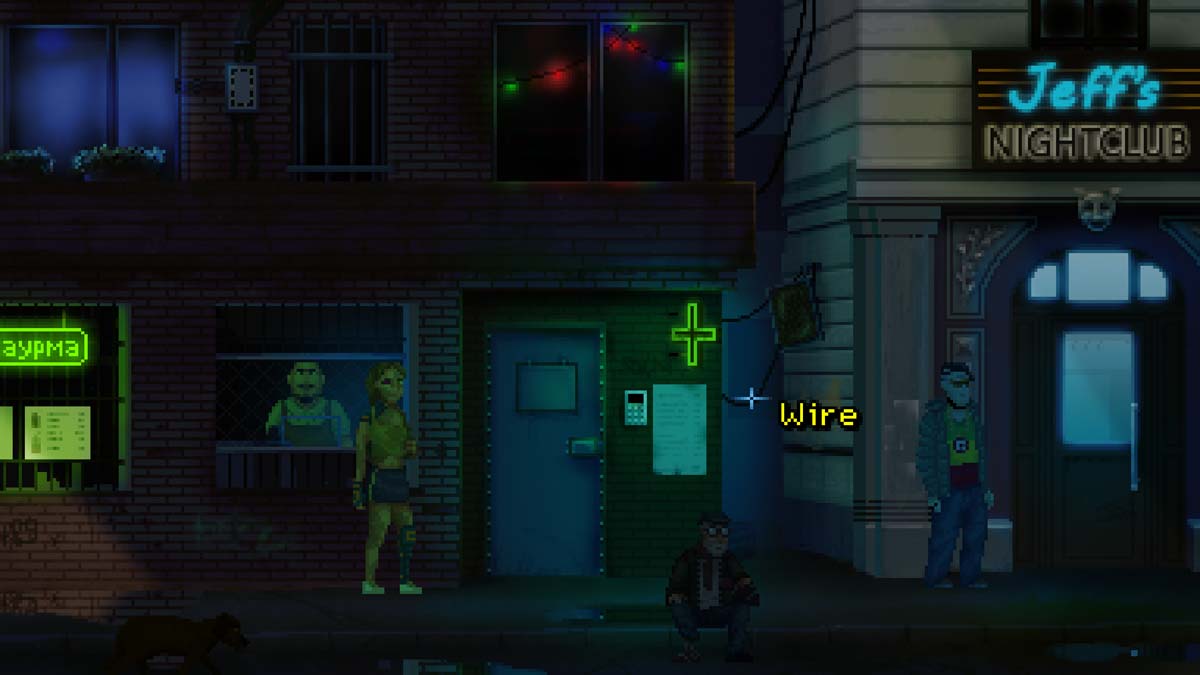
Return to the Electric Box and use the Wire on it, followed by the Fixed Drone. This will charge the Drone, allowing you to use it later.
Head to the middle of the area and speak to Waffalaffia. Talk to him and ask about Lilith (who was involved in the scene at the beginning). Ask him if he “fell into a bucket of tough love” and he will call you a giant chicken (which will be useful later).
Go back to the initial conversation choices and ask him about a spare kebab. Then ask him about his obsession with birds (which only appears after talking to him about the spare kebab).
Keep talking to Waffalaffia with the following options:
- “Why’s your sign in Russian? Aren’t you from Finland?”
- “How’s business, Holmes?”
- “Homie, I’mma say it outright. You got a thing for birds?” (go back one set of choices to see this)
- “You’re talking about Finland and fighting dem Russians a LOT…”
- “…you’re on drugs, you think everyone looks like birds!”
- “…we’re sentient too, we know the plight of oppression, man!”
When Waffalaffia asks you for the password, you will get a list of options. If you need some help, you can get out of the conversation and head to the right of Jeff’s Nightclub. There will be a Poster to the right of the entrance that you can look at to get some hints.
Looking at the poster in your inventory will show you some birds that are identified as whooper swans. Head back to Waffalaffia and tell him that the password is “Whooper Swan”. This option won’t appear if you didn’t look at the poster and examine the birds.
Even if you get the password wrong, Waffalaffia will ask you to get a whooper swan for him. Naturally, there won’t be any in the area, and you will have to lie to him.
Head to the left of the area, near the Ragnaroks bar and examine the Pigeon to the right of the bar sign. Use the Fixed Drone on the Pigeon, then pick up the Dead Pigeon. It is important to examine the Pigeon first, or you won’t be able to use the Drone on it.
Use the Dead Pigeon on Waffalaffia, then explain it to him. Tell him:
- “You’re on drugs right now, right?”
- “And earlier, you thought *I* was all kindsa birds!”
- “So obviously, you’re hallucinating again!”
You will then be asked what birds you have been called. You will get a list, but the following options are the ones that will come up if you used the above conversation options:
- A giant chicken
- A colourful peacock
- A golden goose
Either one of those will work, but the key is Waffalaffia must have labelled you as that bird. If he hasn’t, that option won’t work. “A giant chicken” is the safest option, but if you used all the above conversation options, the other two will work as well.
After the conversation, you will get the Doner Kebab. Use the Kebab on Lilith, who will be walking around the area.
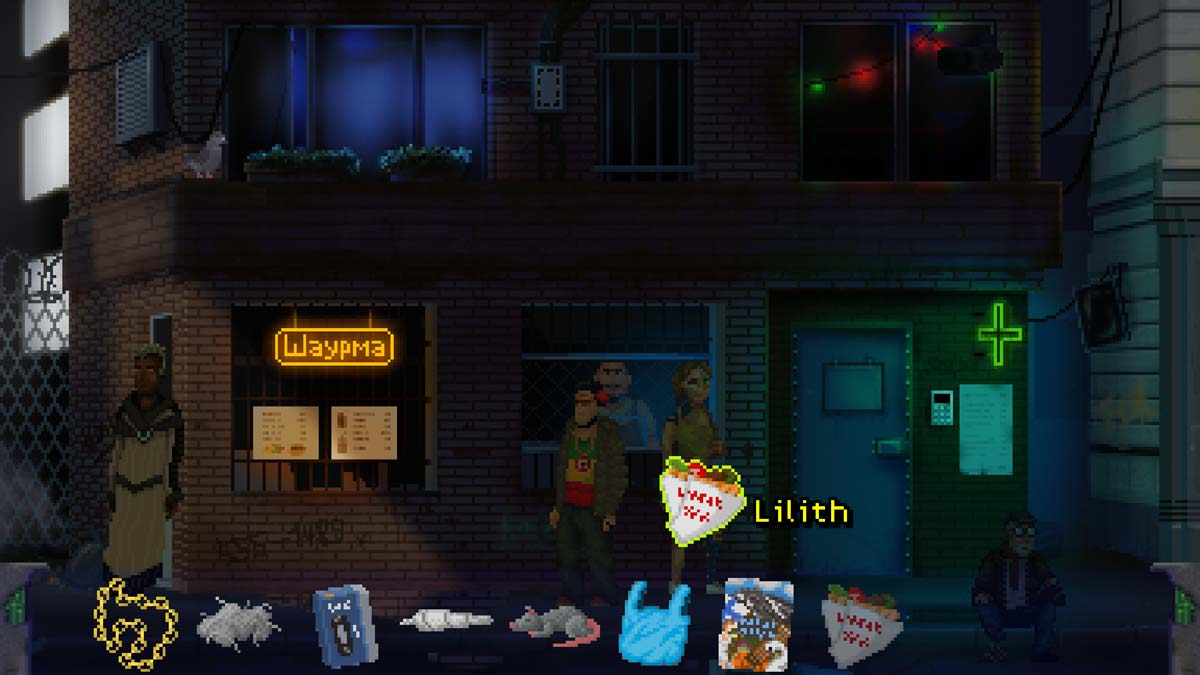
You will then get the Credit Crystal from Lilith. Hand the Credit Crystal to Thunder Lanovich, and you will finish the level.
You will then go back to Eevi going into her deep drill with Hussar.
Drill
When you regain control of Eevi, examine the Cannon in the bottom left corner. Open your inventory and look for the Run Program Utility, then use it on the Cannon to get started.
In the next area, keep moving to the right. You will constantly be blocked by green data streams. Retreat and interact with the Ocean to play scenes that will stop the data streams and continue, but you can’t do anything but proceed.
When you reach the firewall, you don’t have a choice but to use the Utilities from your inventory on the firewall. When the alarm goes off, watch the scenes that follow.
You will jump back to Mariposa in her office.
MIT-01
When you regain control, you will be able to converse with the “being” inside your head. You can ask several questions to try and learn more details.
When you request control of your body back, there are three critical options you can select from. You can choose to kill everyone in the bar, simply restrain them, or refuse to comply.
If you choose to restrain the patrons at the bar (not execute them), you will get the Ethical Consistency Counts achievement. If you refuse to comply, you will get the Collaborator achievement. Going ahead with the “being’s” original plan nets you no achievement.
Regardless of your choice, you will return to Eevi in her apartment.
Apartment Part 2
When you regain control of Eevi, leave her apartment and you will see a drone outside. To bring it down, go to your inventory and select the Madsen Rovdyr Mk. 1 (your handgun), then click on the drone to bring it down.
After the drone is brought down, check the remains in the middle to add the Drone Plate to your inventory.
Head downstairs to get a situation on the ground, but you can’t stay. However, you can now get into Guldklump’s apartment. Use your Hacking Tool on the Door PA to open the door and go inside.
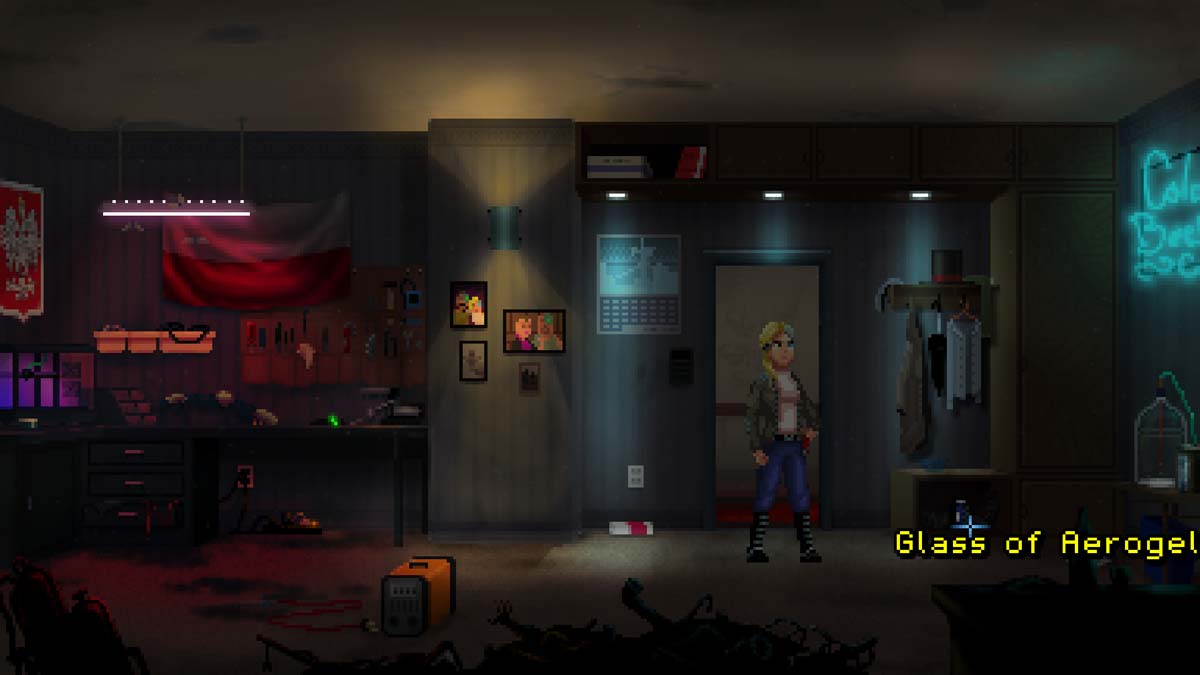
Once inside, check the bottom right part of the room, under the clothes to find a Glass of Aerogel. Pick it up to add the Aerogel to your inventory.
Check the bottom left corner of the entrance to find the Carton of Cigarettes. Interact with it to add the Cigarette Carton to your inventory.
Check the table on the left side of the room and take the Laser Gizmo on the table to add the Laser Welder to your inventory.
To the left of the Laser Gizmo will be a Food Can, interact with it to add the Aebleflaesk Can to your inventory.
Before you leave the room, use the Laser Welder on the Cybernetic Arm (which is between the Laser Gizmo and the Food Can). This will let you know that you need small device batteries to operate the Laser Welder.
Leave the room and go up the stairs to Hussar’s shack. A scene will play and a drone will appear. Head back downstairs, but you need to trigger this scene or you won’t be able to proceed.
Head back to your apartment and check the Wardrobe as you walk in. There will be a Jacket inside. Interact with it three times to get the Bike Keys added to your inventory.
Head left to Eevi’s nightstand and inspect the Vintage Radio. You will take out the battery, giving you the Battery in your inventory. You can then combine the Battery with the Laser Welder to charge it up.
Use your Cybernetic Claw on the Aebleflaesk Can to open it, then use the Can on Faxina. This will get Faxina to come with you, but will also have the effect of adding her to your inventory.
Go back upstairs to Hussar’s shack, then use the Laser Welder on the Crawler Drone. The Drone will be destroyed, and you can “use” Faxina on Hussar’s door to put her inside.
From there, you have two options. You can take the nearby ladder (west of Hussar’s shack) to escape, or you can head back downstairs to get to Gludklump.
Escape
After Faxina is safely in the shack, just interact with the ladder until Eevi climbs down. When the scene plays out, you will have successfully escaped, earning yourself the Roof Acrobat achievement in the meantime.
Fight
You can’t go downstairs right away, as you will need some sort of protection. Take the Aerogel in your inventory and use it on the puddle. This allows it to be used on other objects.
Use the Aerogel on the Drone Plate, then use the Drone Plate on yourself. You can then head downstairs for the rescue.
You won’t get any assistance, and your only choices are to shoot out or surrender. If you choose to shoot out, choose the “Shoot” option to get the Cranial Reconstruction achievement.
No matter what you choose, Eevi will meet the same fate in the end. You will switch to Grandmaster Flashdrive in the sewers.
Sewers
When you first arrive, just head to the right, and inspect the door to enter the Crib.
Once inside, let the scene play out. When it is done, turn on the Computer on the right and use the VR Plug to visit the S-Hop Mainframe.
Upon entering S-Hop, talk to Phil the S-Hop Bouncer. He will prevent you from entering because you need a password. Talk to him and ask for the password, pestering him every time. Don’t back out or you will have to reset. When you reach “I’ll never stop, I have a fresh battery”, you will get the first part of the password, which is “Ken”.
Now you need to select the option to try and guess the rest of the password. You will get a list of options for 3 parts of the password, and they are long. If you look at the S-Hop building windows, you will see the correct word to select. If it is hard to see, the password is:
“Ken sent me again”
Once you get through, you will meet The Microphone. Ask the Microphone “About us…” and then “You said you be needin’ me, what you need the Grandmaster for?” to begin your next objective.

The Microphone wants you to use the turntables to play the right set of music. There are six turntables, and they are all in the default position. You need to listen to the Microphone’s music beats and adjust the turntables to get the right sound.
The Microphone will not give you the same mix requests every game, not even with the same save file if you reload it from the start.
If you aren’t willing to experiment, here are some combinations that work:
- Underlying vibrations, electric rawness, clear musical notes, underlying repetition: First, second, third, fourth turntables.
- Rock, bop their head: First and fourth turntables.
- Rhythm, instrument from faraway place, throat vibrations: First, fifth, and sixth turntables.
Unfortunately, if you are not musically inclined, this can be a struggle. You may have to test and try out different combinations as there is no way to identify it.
Once you pass, you will be moved to a different area. Start by picking up the records on the floor (ie. Pirate Track, Bootlegged Single).
Once all the tracks are picked up, go through the conversation options (it really doesn’t matter what you pick). The scene will change back to Eevi and Mariposa.
Docks
Answer whatever you like when talking about the entities, but your answers don’t matter too much. Regardless, you will be sent back to Ragnarocks for another deep dive.
Sewers Part 2
You will need to find the signal that Mariposa tasked you to find. It will be in the bottom right corner of the area, but the game will be particular about it and you will have to click around.
When you enter the sewers, head to the right to confront a robot banging on Flashdrive’s door. Talk to it, then tell it “You’ll let me through, or you’ll regret it”.
Mention “Now I have you right where I wanted you”, then choose to shoot the robot in the head. This is the only safe option, though other options will give you the Sierra? Is that you? achievement (you will die and be sent back before you talked to the robot).
Inside, examine Flashdrive’s body, then interact with it. You will learn that you need a power cell to keep him charged (your Hack Tool won’t provide enough power).
[[Born Punk Sewers Part II Flashdrive]]
Head back into the sewers and talk to The Mechanic. You will try to get a power cell from him, and he asks what you can offer in exchange. Mention the rights to the giant robot, and you will get the Android Battery.
Return to Flashdrive and use the Android Battery on him. Use your Hack Tool on him and then you will need another power source to keep him going. Turn off the computer and use the VR Plug to restore Flashdrive back to normal.
After the scenes, you will be back in Ragnarocks with all three characters. Have Mariposa go over the plans to make sure everyone knows what to do.
You will regain control of Eevi, and can talk to Klump to learn about Hussar’s location, as well as other conversation topics. Select the Bar Door on the left side of the area when you are ready. Double click the hovercraft on the left side to board (but make a backup save in case you’d like to restart from this point).
Once you board the hovercraft, you can select where you want to go. Your options are:
- Sundsore Kontorer, Glashuset Restaurant
- Nu Norse Church Blimp
- The Chaos Circuits Android Gang
- Free Finland HQ
- Mariposa’s Office
- Flash’s Sewer Dwelling
While order doesn’t strictly matter, the walkthrough will start with Sundsore Kontorer, Glashuset Restaurant.
Restaurant
When you arrive, speak with the Security Android on your left (the one on the right is unresponsive). Start by asking to get inside, saying that you are Miss Sotomayor and if there is an alternative arrangement for ID (you don’t need to bribe, it won’t work).
End the conversation and the team should automatically move to the right, with Mariposa mentioning the Security Android is biased. Open your inventory and “use” Flash on the Security Android, and you will learn that you need another object that can Mariposa’s identity.
Head back to the hovercraft and go to Mariposa’s Office (click the bottom right corner of the screen to bring up the “To Hovercraft” option). Back inside the office, look to your bookshelf on the left and take the Award/Award for Excellence.
Head back to the restaurant and use the Award on the Security Android. You will now need to prove that you support the Android’s rights.
Go back to the Hovercraft and head to Flash’s Sewer Dwelling. Head towards the middle door where Solvune used to stand and check the Poster to the left. Examine it, then interact with it to get the Android Union Poster.
Return to the restaurant and give the Android Union Poster to the Security Android. You will now be able to enter the building.
Past the entrance, you will reach the reception room. Speak to the Nonchalant Receptionist on the left and ask her if there are any open reservations. Then ask her if there is any way to get inside. Choose any option when it comes to the VIP answer, and you will learn that you can talk with a VIP to get in.
Talk with Gunther Magnuson standing at the right of the reception area. Talk to him; the conversation will start out slow, but you will learn he is a VIP member if you ask what he is doing here and if he knows the Glashuset restaurant. Mention that you can help each other out,
Choose to bribe Gunther with credits and you will get the daily password (Roboute). Tell the password to the Nonchalant Receptionist and you will be asked to go through the Metal Detector on her left.
You won’t be able to get through, and you will need a device to help you get through. Leave the restaurant and head to the Chaos Circuit Android Gang hideout. You won’t have to go in, just head to the right and look for an Unknown area. It will look like it is glitching. Examine it first, then interact with it.
This will put you in touch with Kydrax. Ask what he has on hand, then mention what he would accept for the scrambler (the tool you need). Take the Gold Chain from Flashdrive’s inventory and hand it to Kydrax to get the Electronic Scrambler.
Return to the restaurant and use the Electronic Scrambler on the Metal Detector. After the scene, just select the Metal Detector and you will move on.
In the next room, you don’t have to interact with anyone, just head to the Elevator on the left to continue.
In the restaurant itself, you need to look for the Eurograv executive. You must examine them to discern their identity. It is the Feasting Patron to your right when you start.
If you try to talk to her, she will brush you off. You will need to try and get her some food. The kitchen doors are to your left when you start, but they are locked. “Use” Eevi from your inventory on the Keypad next to the doors to get inside.
Enter the kitchen and you will be kicked out. Head back down to the lobby and talk to the Busy Receptionist in the middle. Ask him about being busy, which will then open the option to be registered as temporary kitchen hands. Once the registration is complete, head back to the kitchen.
You can now return to the kitchen and go inside without getting kicked out. Interact with the Crate of Apples to get an Apple for your inventory.
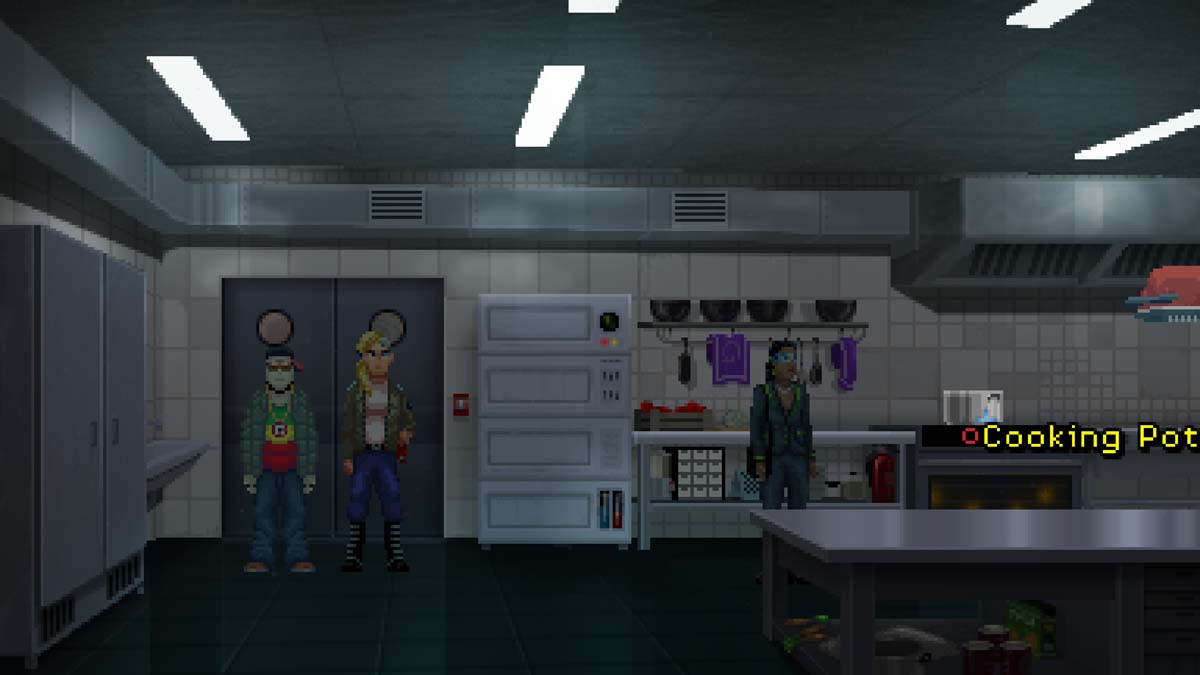
Speak with the Chef on the left and talk to him about the Feasting Patron (scroll down if you can’t see the options). After the scene, Use the Apple in your inventory on the Cooking Pot.
Head back outside and use Flashdrive from your inventory on the Feasting Patron. This will allow Flashdrive to steal the security details from the patron, and you can now leave the restaurant with your objective completed.
It is now time to go to the Chaos Circuit Android Gang.
Android Gang
When you arrive, talk to the CORG1 standing at the top of the entrance to the upper right. Start with “Good doggy” to begin the conversation, then talk about going inside. You will be let inside without much fuss.
Head to the middle of the area and speak to C1RCU1T who is sitting down. Ask for the leader of the Chaos Circuits, then ask for help. You will be tasked with removing some corp-hunters from the alley to get the assistance you need.
Head back to the entrance and move to the left side to find the Alley (just left of the truck). Enter the Alley and after the scene, you will regain control. Turn on the Radio above the Speaker, which will occupy the man leaning against the tree.
Return to the hovercraft and go back to Flash’s home. Enter the crib and take the Spray Can sitting above the speaker.
Return to the Alley, and use Mariposa from your inventory, having her speak with the Elegant Sniper in the middle. Do the same with Eevi with the Corporate Minigunner. When everyone is distracted, throw the Spray Can from your inventory into the Bonfire.
Return to C1RCU1T after the scene. You will get his help, and you will get The Chaos Circuits achievement after your work is done.
It’s now time to head to the Nu Norse Church Blimp.
Church Blimp
After the scene, talk to the Valkyr Guard on the left and inquire about the trials. Your first trial will be to procure something related to Iceland.
Return to the Glashuset restaurant and return to the receptionist counter in the Lobby. Examine the Flowers and you will note that they are from Iceland, which will fulfill the first task. Speak to the Artificial Receptionist on the right (the flowers belong to her) and ask about the flowers.
Ask her what her price will be (the “Everyone has a price) option, then “use” Flashdrive from your inventory on the Artificial Receptionist. After the scene, you will get the Rare Flowers in your inventory.
Return to the Blimp and give the Rare Flowers to the Valkyr Guard. This will allow you to proceed forward. Go inside and after the scene, speak to the Female Elder to begin the second trial. You are asked about the location, the answer is “Arkanost”.
Speak with the Male Elder to begin the next trial. You need to get something related to Loki.
Head back to the Glashuset restaurant and go to the top floor. Go into the kitchen and examine the Crate of Apples to trigger the “sin” idea. When the Cooking Droid takes an apple from the crate and puts it into the Cooking Pot, interact with it to pull the Cooked Apple into your inventory.
Return to the Blimp and use the Cooked Apple on the Male Elder. Your next trial will involve speaking to the Aggressive Elder on the right. He will ask to fight one of your companions. Flashdrive is the best choice for this fight.
There are no real strategies here; you are selecting attacks towards the head, chest, and legs. You are also going to block/defend yourself every other move. It’s randomly done, though you obviously want to hit the opponent and block their attacks. If you win, you will get the Boxing Master achievement (easier to do with Flashdrive since he doesn’t sweat).
When the fight ends, head to the right and go through the Doorway. Talk to the Priestess and scroll down to begin the deal. Take a Diplomatic Approach and the situation will be resolved peacefully.
The last location you need to tackle is the Free Finland HQ
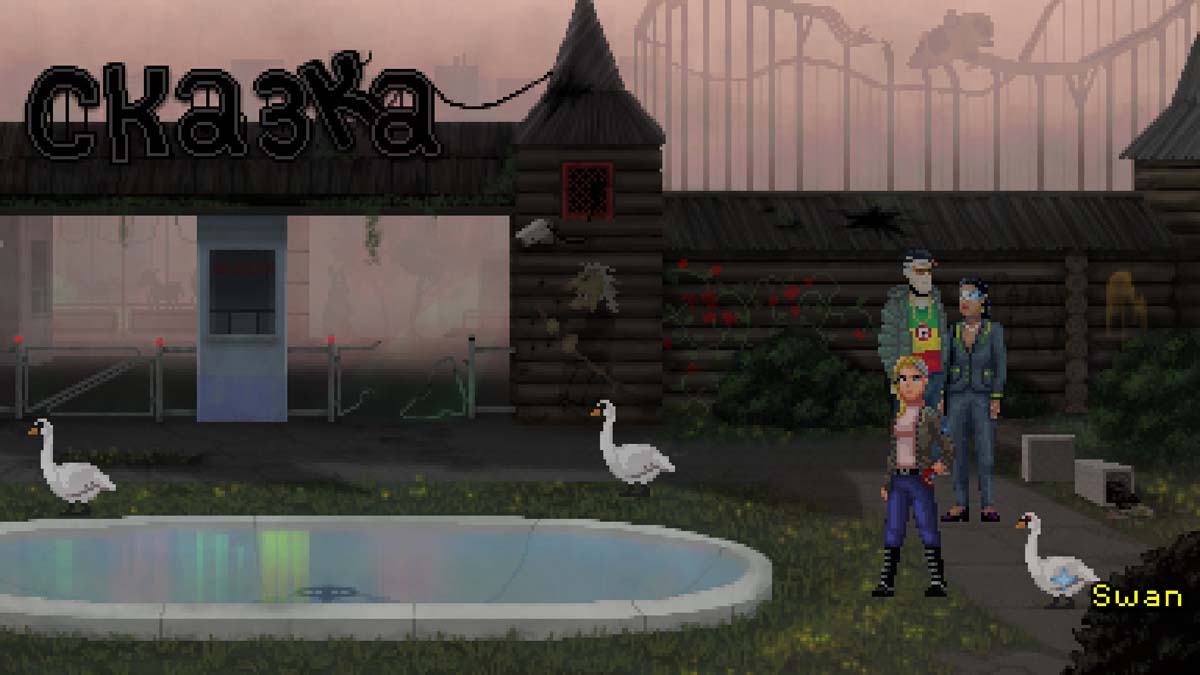
Free Finland HQ
When you regain control, head to the right of the area and examine the Swan with a red eye. It will appear to give off a Wi-Fi signal. Use the Madsen Rovdyr Mk. 1 gun on the Swan and you will drain the lake in the middle, leading to the Hatch that’s at the bottom.
Interact with the Hatch to go down into the sewers. Inspect the Notice, then keep going to the right.
From there, there is no real guide to get you into the sewers. The paths are randomised every time, and there isn’t a good way of tracking the location. You must keep trying different directions until you end up at Observation Deck 6-A.
When you do arrive, head inside the Entrance and you will meet up with Waffalaffia again. Head to the right to speak with Hussar.
Speak with Hussar and that will get Free Finland’s cooperation.
If followed along, this should be the last mission. Watch the scenes and that will be the end of the game.
If you made it through to the end of Born Punk (with or without our help), let us know what you thought of the game. If you did use our guide, please let us know if it helped.