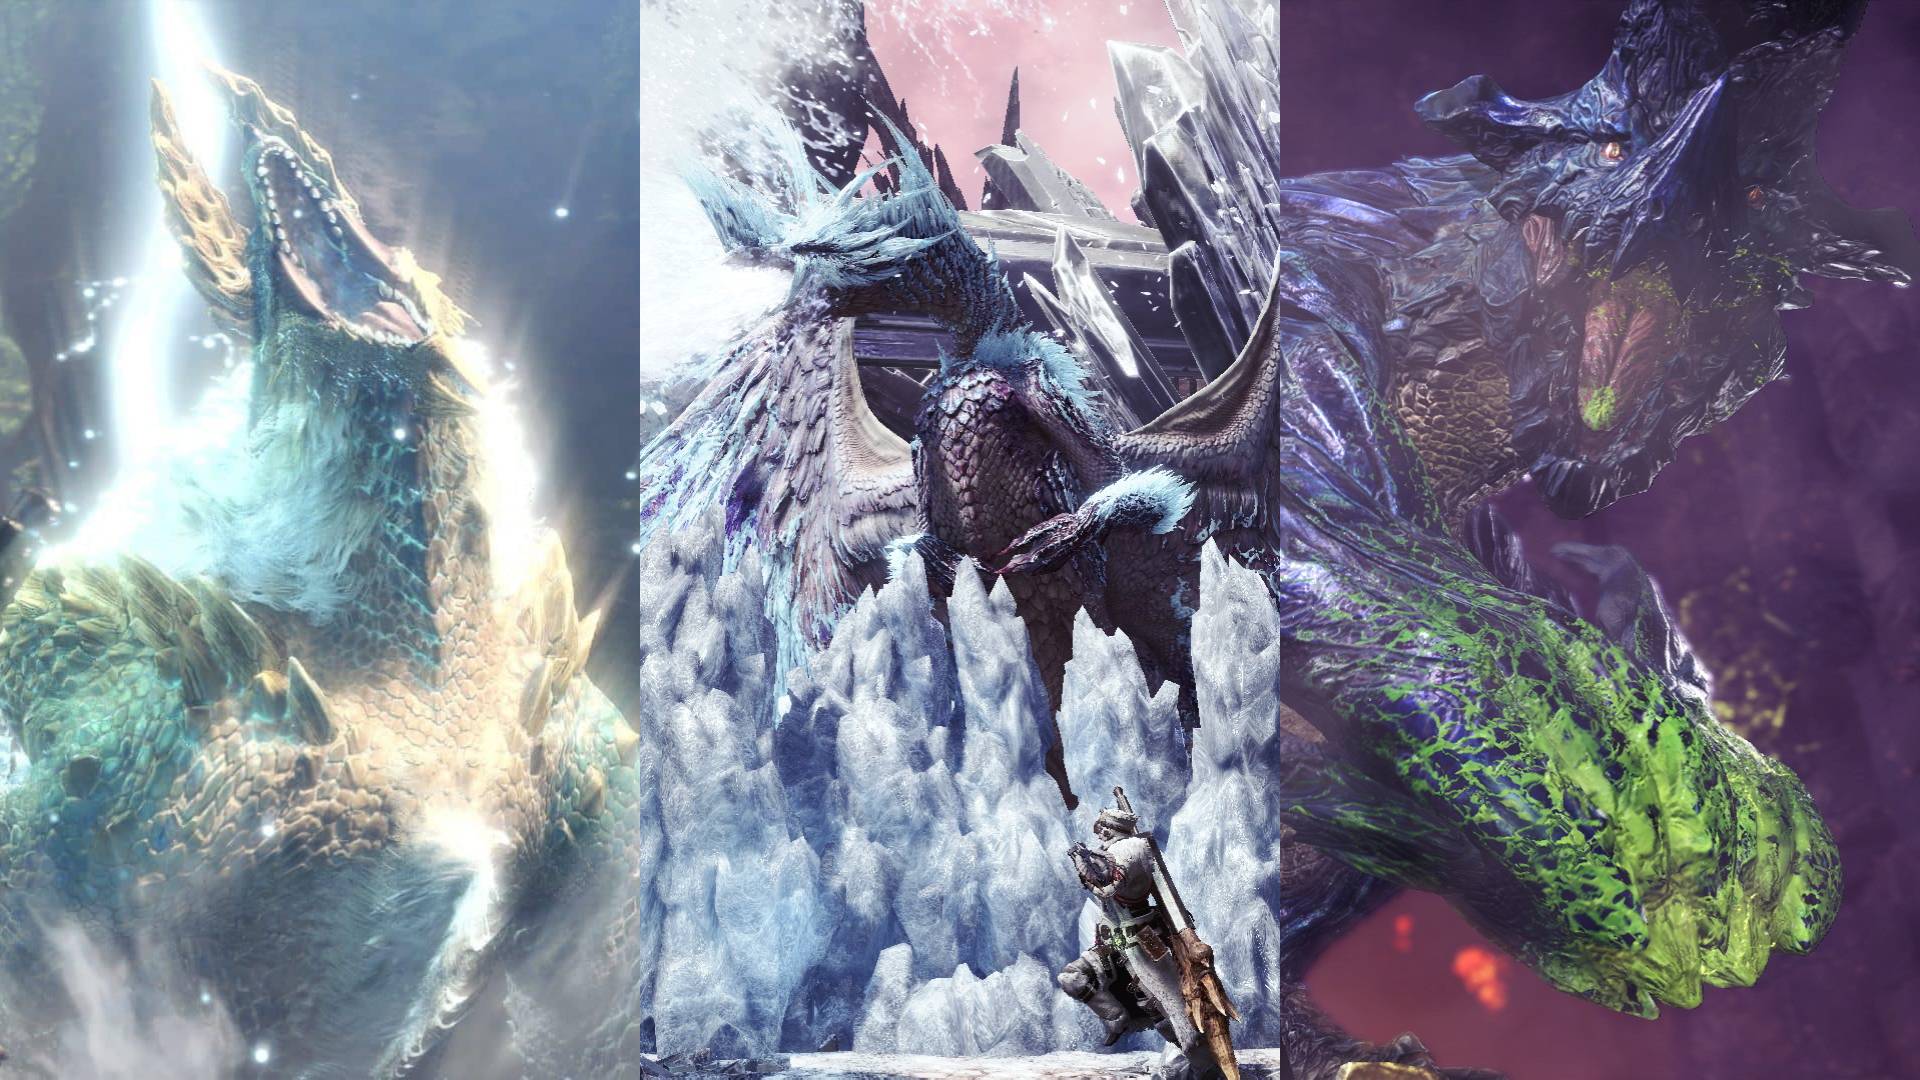
Monster Hunter World: Iceborne features quite a nice assortment of monsters of all varieties. If you read my review of the expansion you would be aware that the game doesn’t just throw the game’s existing monsters by the wayside. Instead, it expands on their behaviours and movesets in some minor ways, making them a bit more interesting to tackle. The game now features around 60 monsters and keeping track of all of their important information, like weaknesses and resistances, can be a bit of a hassle unless you are incredibly familiar with the game’s UI. To combat this, I’ve compiled a list of every monster that has been added in Iceborne. Be wary, this list does contain SPOILERS for monsters in the game. With that out of the way, let’s begin:
NOTE: A small handful of the monster info is not in yet, this article will be updated when I get more info on those monsters
Useful info – You can force this monster out of the snow by stripping/breaking the snow packed onto its body. It can also be pulled out of the snow by using scream prods, allowing you to attack and break its leg fins, minimizing the amount of Iceblight it can apply to you. Be sure you boost your Ice resistance as well as packing your Iceproof mantle and Nulberries.
Move(s) to keep an eye out for – If it does a backflip and completely submerges itself in the snow, be ready for it to jump out towards you, bringing a wave of snow and Iceblight with it.
Locale(s) – Hoarfrost Reach
Elements & Ailments – Ice, Iceblight
Weaknesses & Resistances
- Elements
- Fire – ♦♦♦
- Water – ♦
- Thunder – ♦♦
- Ice – X
- Dragon – X
- Ailments
- Poison – ♦♦
- Sleep – ♦♦
- Paralysis – ♦♦
- Blast – ♦♦♦
- Stun – ♦♦
- Body Parts
- Head – Breakable (weak point)
- Cut damage – ♦♦
- Blunt damage – ♦♦♦
- Ammo damage – ♦♦
- Chest – Breakable
- Legs – Breakable (weak point)
- Cut damage – ♦♦♦
- Blunt damage – ♦♦♦
- Ammo damage – ♦♦♦
- Tail – Breakable (weak point)
- Cut damage – ♦♦
- Blunt damage – ♦♦
- Ammo damage – ♦♦
- Head – Breakable (weak point)
Materials
- Dropped material – Cryo Sac
- Head broken – Beotodus Hardhorn
- Chest broken – Beotodus Cortex
- Legs broken – Beotodus Grandfin
- Tail broken – Beotodus Shard
- Carves – Frequency (♦):
- Beotodus Shard – ♦♦♦♦♦
- Beotodus Cortex – ♦♦♦♦
- Beotodus Hardhorn – ♦♦♦
- Beotodus Grandfin – ♦♦♦♦
- Large Wyvern Gem – ♦
- Rewards – Frequency (♦):
- Beotodus Cortex – ♦♦♦♦
- Beotodus Shard – ♦♦♦
- Beotodus Hardhorn – ♦♦♦
- Beotodus Grandfin – ♦♦♦
- Cryo Sac – ♦♦♦♦
- Large Wyvern Gem – ♦
Useful info – If you find yourself in dire need of countering Banbaro’s aggressive charges, heavy blows to the legs may help. Additionally, Scatternuts and Crystalburst can halt the brute wyvern’s charge. Bring whichever mantle matches the locale (Iceproof for Hoarfrost Reach, Fireproof for Elder’s Recess) and pack Nulberries, just in case.
Move(s) to keep an eye out for – Watch out for when Banbaro digs its horn in the ground. Much like Tesucabra from previous games, it can dig up debris from the ground. Additionally, what it digs up is based on its environment, so be aware of which locale you are fighting it in.
Locale(s) – Ancient Forest, Wildspire Waste, Coral Highlands, Rotten Vale, Elder’s Recess, Hoarfrost Reach
Elements & Ailments – Ice, Fire, Iceblight, Fireblight
Weaknesses & Resistances
- Elements
- Fire – ♦♦
- Water – X
- Thunder – ♦
- Ice – X
- Dragon – ♦♦♦
- Ailments
- Poison – ♦♦
- Sleep – ♦♦
- Paralysis – ♦♦
- Blast – ♦♦♦
- Stun – ♦♦♦
- Body parts
- Horns – Breakable (weak point)
- Cut damage – ♦
- Blunt damage – ♦♦
- Ammo damage – ♦
- Head – (weak point)
- Cut damage – ♦♦♦
- Blunt damage – ♦♦♦
- Ammo damage – ♦♦♦
- Legs – Breakable (weak point)
- Cut damage – ♦♦
- Blunt damage – ♦♦
- Ammo damage – ♦♦
- Tail – Severable
- Horns – Breakable (weak point)
Materials
- Dropped material – Banbaro Cortex
- Horn broken – Banbaro Great Horn
- Legs broken – Banbaro Chine
- Tail carved – Banbaro Lash, Large Wyvern Gem (rare)
- Carves – Frequency (♦):
- Banbaro Chine – ♦♦♦♦
- Banbaro Cortex – ♦♦♦♦♦
- Banbaro Great Horn – ♦♦♦
- Banbaro Lash – ♦♦♦
- Large Wyvern Gem – ♦
- Rewards – Frequency (♦):
- Banbaro Chine – ♦♦♦♦♦
- Banbaro Cortex – ♦♦♦♦
- Banbaro Lash – ♦♦♦
- Banbaro Great Horn – ♦♦♦
- Dash Extract – ♦♦♦
- Large Wyvern Gem – ♦
Useful info – The Viper Tobi-Kadachi is dangerous from all ranges and uses its agility with its aggression to overwhelm the player. As a result, the fanged wyvern can tire easily and attacking the soft parts of its body will help in causing the monster’s fatigue, making it less mobile and allowing for some heavier damage to be dealt. Packing some extra Antidotes and an Immunity mantle is advised.
Move(s) to keep an eye out for – Viper Tobi-Kadachi uses quills to administer its lethal poison at range. Be wary of its tail swipes which can throw the poison quills if you are at a distance or just poison you if you are close. Be sure to stay away from its mouth as its bite has a paralysis effect as well.
Locale(s) – Hoarfrost Reach
Elements & Ailments – Poison, Paralysis
Weaknesses & Resistances
- Elements
- Fire – ♦
- Water – X
- Thunder – ♦♦♦
- Ice – ♦♦
- Dragon – ♦
- Ailments
- Poison – ♦
- Sleep – ♦♦
- Paralysis – ♦
- Blast – ♦♦
- Stun – ♦♦
- Body parts
- Head – Breakable (weak point)
- Cut damage – ♦♦♦
- Blunt damage – ♦♦♦
- Ammo damage – ♦♦♦
- Neck – (weak point)
- Cut damage – ♦♦♦
- Blunt damage – ♦♦♦
- Ammo damage – ♦♦
- Back – Breakable
- Forelegs – Breakable (weak point)
- Cut damage – ♦♦♦
- Blunt damage – ♦♦♦
- Ammo damage – ♦♦
- Tail – Breakable
- Head – Breakable (weak point)
Materials
- Dropped material – Viper Tobi-Kadachi Shard
- Head broken – Viper Tobi-Kadachi Thorn
- Back broken – Viper Tobi-Kadachi Thickfur
- Forelegs broken – Viper Tobi-Kadachi Hardclaw
- Tail broken – Viper Tobi-Kadachi Thorn
- Carves – Frequency (♦):
- Viper Tobi-Kadachi Thickfur – ♦♦♦♦
- Viper Tobi-Kadachi Membrane+ – ♦♦♦♦
- Viper Tobi-Kadachi Shard – ♦♦♦♦♦
- Viper Tobi-Kadachi Thorn – ♦♦♦
- Viper Tobi-Kadachi Hardclaw – ♦♦♦
- Large Wyvern Gem – ♦
- Rewards – Frequency (♦):
- Viper Tobi-Kadachi Thickfur – ♦♦♦♦
- Viper Tobi-Kadachi Shard – ♦♦♦♦
- Viper Tobi-Kadachi Membrane+ – ♦♦♦
- Viper Tobi-Kadachia Hardclaw – ♦♦♦
- Deadly Poison Sac – ♦♦♦
- Ultraplegia Sac – ♦♦♦
- Large Wyvern Gem – ♦
Useful info – This subspecies of the Paolumu plays around with its sedative gas in the hopes of putting the hunter to sleep. It will flick its tail, slam on the ground and blow air to spread its gas all around the area in which it is fighting. Additionally, the Nightshade Paolumu tends to stay airborne for as long as possible. Flash Pods will only work for so long as Mastery Rank monsters develop an increasing resistance to the hunter tools. Definitely bring some energy drinks and your Immunity mantle.
Move(s) to keep an eye out for – Nightshade Paolumu will be one of the first monsters where you’ll really want to abuse the strength of the clutch claw, as it is very effective at dealing damage to an airborne enemy. Be wary of when it begins to spin in circles very quickly as this is one of its strongest attacks, mounting it using the clutch claw during this attack can very easily see you carted back to camp. Also try to keep it away from its big cloud of sleeping gas so it doesn’t spread the ailing hazard.
Locale(s) – Ancient Forest, Wildspire Waste
Elements & Ailments – Sleep
Weaknesses & Resistances
- Elements
- Fire – ♦♦
- Water – ♦♦♦
- Thunder – ♦
- Ice – ♦
- Dragon – X
- Ailments
- Poison – ♦♦
- Sleep – ♦
- Paralysis – ♦♦
- Blast – ♦♦
- Stun – ♦♦
- Body Parts
- Head – (weak point)
- Cut damage – ♦♦♦
- Blunt damage – ♦♦♦
- Ammo damage – ♦♦
- Neck pouch – Breakable (weak point)
- Cut damage – ♦♦♦
- Blunt damage – ♦♦♦
- Ammo damage – ♦♦♦
- Wings – Breakable
- Back – Breakable
- Chest – (weak point)
- Cut damage – ♦♦
- Blunt damage – ♦♦
- Ammo damage – ♦♦
- Tail – Breakable
- Head – (weak point)
Materials
- Dropped material – Nightshade Paolumu Shard
- Neck pouch broken – Nightshade Paolumu Thickfur
- Wings broken – Nightshade Paolumu Fellwing
- Back broken – Nightshade Paolumu Thickfur
- Tail broken – Paolumu Cortex
- Carves – Frequency (♦):
- Nightshade Paolumu Thickfur – ♦♦♦♦
- Nightshade Paolumu Shard – ♦♦♦♦♦
- Paolumu Cortex – ♦♦
- Nightshade Paolumu Fellwing – ♦♦♦♦
- Large Wyvern Gem – ♦
- Wyvern Gem – ♦
- Rewards – Frequency (♦):
- Nightshade Paolumu Thickfur – ♦♦♦♦
- Nightshade Paolumu Shard – ♦♦♦♦
- Paolumu Cortex – ♦♦♦
- Nightshade Paolumu Fellwing – ♦♦
- Torpor Sac – ♦♦♦♦
- Large Wyvern Gem – ♦
Useful info – When it feeds and enrages, its extremities which spout water begin to glow a bright red – focus your attacks on these points to bring the monster back to its normal state, these areas also take increased damage.
Move(s) to look out for – Most of Coral Pukei-Pukei’s most threatening moves are from the tail. Spouting powerful jets of water, the tail can deal high damage as well as inflicting the hunter with Waterblight. Keep your eye on the tail so you can move accordingly. Do also keep in mind that Coral Pukei-Pukei can spit water at you from in front, so you shouldn’t hang in front of it too much. Bringing Nulberries and the Waterproof mantle is recommended.
Locale(s) – Coral Highlands
Elements & Ailments – Water, Waterblight
Weaknesses & Resistances
- Elements
- Fire – ♦
- Water – X
- Thunder – ♦♦
- Ice – ♦♦♦
- Dragon – ♦
- Ailments
- Poison – ♦♦♦
- Sleep – ♦♦
- Paralysis – ♦♦
- Blast – ♦♦
- Stun – ♦♦
- Body Parts
- Head – Breakable (weak point)
- Cut damage – ♦♦♦
- Blunt damage – ♦♦♦
- Ammo damage – ♦♦♦
- Wings – Breakable (weak point)
- Cut damage – ♦♦
- Blunt damage – ♦♦
- Ammo damage – ♦♦♦
- Back – Breakable
- Tail – Severable (weak point)
- Cut damage – ♦♦♦
- Blunt damage – ♦♦
- Ammo damage – ♦♦
- Head – Breakable (weak point)
Materials
- Dropped material – Coral Pukei-Pukei Shard
- Head broken – Large Coral Pukei-Pukei Sac
- Wings broken – Coral Pukei-Pukei Fellwing
- Back broken – Coral Pukei-Pukei Cortex
- Tail carved – Coral Pukei-Pukei Lash
- Carves – Frequency (♦):
- Coral Pukei-Pukei Cortex – ♦♦♦♦
- Coral Pukei-Pukei Fellwing – ♦♦♦
- Coral Pukei-Pukei Shard – ♦♦♦♦
- Coral Pukei-Pukei Lash – ♦♦♦
- Large Coral Pukei-Pukei Sac – ♦♦♦
- Fey Wyvern Gem – ♦
- Rewards – Frequency (♦):
- Coral Pukei-Pukei Cortex – ♦♦♦♦♦
- Coral Pukei-Pukei Fellwing – ♦♦♦♦
- Coral Pukei-Pukei Shard – ♦♦♦
- Coral Pukei-Pukei Lash – ♦♦♦
- Flood Sac – ♦♦♦♦
- Fey Wyvern Gem – ♦
Useful info – The more parts on the monster that you break, the less lethal it becomes in its mobility. It’s recommended when you engage with one that you trap it with a Shock Trap or Pitfall Trap and focus your damage all into one foreleg. Once that foreleg is broken, its aggressive charges will become more manageable and it will start to slip and tumble.
Move(s) to keep an eye out for – Be very wary of Barioth’s various ice breath maneuvers, they can deal a decent chunk of damage and can apply Iceblight. The other major move to look out for is its quick ground slam, you’ll know it because Barioth will hit the ground with one foreleg and quickly jump into the air – if this happens be ready to dodge. Bringing Nulberries and the Iceproof mantle is recommended.
Locale(s) – Hoarfrost Reach
Elements & Ailments – Ice, Iceblight
Weaknesses & Resistances
- Elements
- Fire – ♦♦♦
- Water – X
- Thunder – ♦♦
- Ice – X
- Dragon – ♦
- Ailments
- Poison – ♦♦
- Sleep – ♦♦
- Paralysis – ♦♦
- Blast – ♦♦
- Stun – ♦♦
- Body Parts
- Head – Breakable (weak point)
- Cut damage – ♦♦♦
- Blunt damage – ♦♦♦
- Ammo damage – ♦♦♦
- Foreleg/Spike – Breakable (weak point)
- Cut damage – ♦
- Blunt damage – ♦♦
- Ammo damage – ♦
- Tail – Severable (weak point)
- Cut damage – ♦♦
- Blunt damage – ♦
- Ammo damage – ♦♦
Materials
- Dropped material – Barioth Greatspike
- Head broken – Amber Hardfang
- Foreleg/Spike broken – Barioth Hardclaw
- Tail carved – Barioth Lash, Large Wyvern Gem (rare)
- Carves – Frequency (♦):
- Barioth Coretx – ♦♦♦♦♦
- Barioth Thickfur – ♦♦♦♦
- Barioth Hardclaw – ♦♦♦
- Barioth Greatspike – ♦♦♦
- Barioth Lash – ♦♦♦
- Large Wyvern Gem – ♦
- Rewards – Frequency (♦):
- Barioth Thickfur – ♦♦♦♦
- Barioth Cortex – ♦♦♦♦
- Barioth Hardclaw – ♦♦♦
- Barioth Lash – ♦♦
- Barioth Greatspike – ♦♦♦
- Large Wyvern Gem – ♦
- Cryo Sac – ♦♦♦
Useful info – Nargacuga can be a bit of a handful to deal with due to how aggressive in nature it is. Hunters will find that when it’s not enraged, Pitfall Traps will be destroyed by it. As the monster becomes more and more fatigued and its speed dulls, hunters will find that luring it into multiple turf wars and making use of Drain decorations will prove most beneficial.
Move(s) to keep an eye out for – By far one of the more devastating attacks in Nargauga’s repertoire is its tail slam. You do not want to get crushed by this, especially when it decides to do a follow-up slam. Also keep an eye out for when it keeps its distance as it might start launching its tail spikes at you. You’ll find the Temporal and Rocksteady mantles especially useful in either avoiding damage altogether or ignoring the minor staggering that its moves can do.
Locale(s) – Ancient Forest, Coral Highlands
Elements & Ailments – Bleeding
Weaknesses & Resistances
- Elements
- Fire – ♦♦
- Water – X
- Thunder – ♦♦♦
- Ice – ♦
- Dragon – ♦
- Ailments
- Poison – ♦♦
- Sleep – ♦♦
- Paralysis – ♦♦
- Blast – ♦♦
- Stun – ♦♦
- Body Parts
- Head – Breakable (weak point)
- Cut damage – ♦♦♦
- Blunt damage – ♦♦♦
- Ammo damage – ♦♦
- Foreleg/Cutwing – Breakable
- Tail base – (weak point)
- Cut damage – ♦♦♦
- Blunt damage – ♦♦
- Ammo damage – ♦♦♦
- Tail tip – Severable (weak point)
- Cut damage – ♦♦
- Blunt damage – ♦♦
- Ammo damage – ♦♦
- Head – Breakable (weak point)
Materials
- Dropped material – Nargacuga Tailspear
- Head broken – Nargacuga Hardfang, Nargacuga Mantle (rare)
- Foreleg/Cutwing broken – Nargacuga Cutwing+
- Tail carved – Nargacuga Lash, Nargacuga Mantle (rare)
- Carves – Frequency (♦):
- Nargacuga Shard – ♦♦♦♦♦
- Nargacuga Blackfur+ – ♦♦♦♦
- Nargacuga Hardfang – ♦♦♦
- Nargacuga Tailspear – ♦♦♦
- Nargacuga Lash – ♦♦♦
- Nargacuga Mantle – ♦
- Rewards – Frequency (♦):
- Nargacuga Blackfur+ – ♦♦♦♦
- Nargacuga Shard – ♦♦♦♦
- Nargacuga Tailspear – ♦♦♦
- Nargacuga Hardfang – ♦♦♦
- Nargacuga Cutwing+ – ♦♦♦
- Nargacuga Lash – ♦♦
Useful info – Hunters will notice that Glavenus has a tendency to sharpen its tail on a regular basis while it is red hot. As a result, Glavenus will have slag stored in its mouth which it can spit as a fiery breath, striking it’s throat while it is glowing red will prove advantageous with taking down this member of the Fated Four.
Move(s) to keep an eye out for – Glavenus has a couple attacks that could be obnoxious to less alert hunters. For starters, Glavenus’ slag which it spits becomes explosive after being exposed to the air for a while, it is advised to steer clear from this until it has exploded. After fighting for a little while, Glavenus will randomly add an extra tail slam to its standard tail slam, unsuspecting hunters are bound to get hit by this move, dealing high physical damage and likely applying Fireblight. When a tail slam is performed, keep an eye on Glavenus’ body, if it is moving too much be ready to dodge a second slam. High fire resistance, the Fireproof mantle and Blight protection is recommended.
Locale(s) – Ancient Forest, Wildspire Waste, Elder’s Recess
Elements & Ailments – Fire, Fireblight
Weaknesses & Resistances
- Elements
- Fire – X
- Water – ♦♦♦
- Thunder – ♦
- Ice – ♦♦
- Dragon – ♦♦
- Ailments
- Poison – ♦♦
- Sleep – ♦♦
- Paralysis – ♦♦
- Blast – ♦♦
- Stun – ♦♦
- Body Parts
- Head – Breakable (weak point)
- Cut damage – ♦♦♦
- Blunt damage – ♦♦♦
- Ammo damage – ♦♦
- Neck – (weak point)
- Cut damage – ♦♦♦
- Blunt damage – ♦♦♦
- Ammo damage – ♦♦♦
- Forelegs – Breakable
- Back – Breakable
- Tail – Severable (weak point)
- Cut damage – ♦♦
- Blunt damage – ♦♦
- Ammo damage – ♦♦
- Head – Breakable (weak point)
Materials
- Dropped material – Molten Bursa
- Head broken – Glavenus Hardfang, Glavenus Mantle (rare)
- Forelegs broken – Glavenus Shard
- Back broken – Glavenus Hellshell
- Tail carved – Glavenus Tailedge, Glavenus Mantle (rare)
- Carves – Frequency (♦):
- Glavenus Shard – ♦♦♦♦♦
- Glavenus Cortex – ♦♦♦♦
- Glavenus Hardfang – ♦♦♦
- Glavenus Hellshell – ♦♦♦
- Glavenus Tailedge – ♦♦
- Glavenus Mantle – ♦
- Rewards – Frequency (♦):
- Glavenus Cortex – ♦♦♦♦
- Glavenus Shard – ♦♦♦♦
- Molten Bursa – ♦♦♦
- Glavenus Hellshell – ♦♦♦
- Glavenus Hardfang – ♦♦♦
- Glavenus Tailedge – ♦♦
Useful info – This infamous flying wyvern has a habit of repeatedly charging the hunter in the hopes of catching it and dealing heavy damage. Hunters should not rely on obstacles and ledges to be safe from Tigrex’s charge, but rather steer clear entirely. Drain decorations will prove effective here as forcing exhaustion will help minimise the amount of charges that Tigrex will do. Much like Banbaro, the rocks that Tigrex throws match the environment it is being fought in.
Move(s) to keep an eye out for – If you see Tigrex begin to hold back towards the end of a charge, be ready for one of its tailspin attacks. Hunters need to be quick with their reactions else they get hit by Tigrex’s powerful tail. Severing the tail will help with avoiding this attack. The Temporal mantle and stun resistance is advised, as well as a mantle that matches the locale you are fighting the Tigrex in.
Locale(s) – Ancient Forest, Wildspire Waste, Rotten Vale, Elder’s Recess, Hoarfrost Reach
Elements & Ailments – Ice, Fire, Iceblight, Fireblight
Weaknesses & Resistances
- Elements
- Fire – X
- Water – ♦
- Thunder – ♦♦♦
- Ice – ♦
- Dragon – ♦♦
- Ailments
- Poison – ♦♦
- Sleep – ♦♦
- Paralysis – ♦♦
- Blast – ♦♦
- Stun – ♦♦
- Body Parts
- Head – Breakable (weak point)
- Cut damage – ♦♦♦
- Blunt damage – ♦♦♦
- Ammo damage – ♦♦♦
- Forelegs – Breakable (weak point)
- Cut damage – ♦♦♦
- Blunt damage – ♦♦♦
- Ammo damage – ♦♦
- Tail – Severable (weak point)
- Cut damage – ♦♦♦
- Blunt damage – ♦♦
- Ammo damage – ♦♦
- Head – Breakable (weak point)
Materials
- Dropped material – Tigrex Shard
- Head broken – Tigrex Hardfang, Tigrex Mantle (rare)
- Forelegs broken – Tigrex Hardclaw
- Tail carved – Tigrex Lash, Tigrex Mantle (rare)
- Carves – Frequency (♦):
- Tigrex Cortex – ♦♦♦♦
- Tigrex Shard – ♦♦♦♦♦
- Tigrex Hardclaw – ♦♦♦♦
- Tigrex Hardfang – ♦♦♦
- Tigrex Mantle – ♦
- Rewards – Frequency (♦):
- Tigrex Cortex – ♦♦♦♦
- Tigrex Shard – ♦♦♦♦
- Tigrex Hardclaw – ♦♦♦
- Tigrex Lash – ♦♦
- Tigrex Hardfang – ♦♦♦
- Monster Slogbone – ♦♦♦
Useful info – Brachydios uses the slime it secretes as its weapon. Hunters will very quickly find that this slime has explosive properties and those who step in it will be afflicted with a more aggressive form of Blastblight. It is recommended to avoid this slime where possible, otherwise rolling should prevent a hunter from exploding. Water-based and ice-based attacks prove effective at mitigating the effectiveness of the slime on Brachydios’ arms and head.
Move(s) to keep an eye out for – Most of Brachydios’ moves are pretty easy to manage, as a majority of them are pretty well telegraphed. Do keep an eye out for the pools of slime it leaves behind, as they will slowly convert to a red glow and explode. Also be wary when it enrages as its slime combusts almost immediately in this state. A Fireproof mantle is recommended and Watermoss should help manage to the slime as a distance.
Locale(s) – Elder’s Recess
Elements & Ailments – Blastblight
Weaknesses & Resistances
- Elements
- Fire – X
- Water – ♦♦
- Thunder – ♦
- Ice – ♦♦♦
- Dragon – ♦
- Ailments
- Poison – ♦♦
- Sleep – ♦♦
- Paralysis – ♦♦
- Blast – ♦
- Stun – ♦♦
- Body Parts
- Head – Breakable (weak point)
- Cut damage – ♦♦♦
- Blunt damage – ♦♦♦
- Ammo Damage – ♦♦♦
- Forelegs – Breakable (weak point)
- Cut damage – ♦♦
- Blunt damage – ♦♦
- Ammo damage – ♦♦
- Tail – Severable (weak point)
- Cut damage – ♦♦♦
- Blunt damage – ♦♦
- Ammo Damage – ♦♦♦
- Head – Breakable (weak point)
Materials
- Dropped material – Glowing Slime
- Head broken – Brachydios Crown, Brachydios Pallium (rare)
- Legs broken – Brachydios Pounder+, Brachydios Pallium (rare)
- Tail carved – Brachydios Lash, Brachydios Pallium (rare)
- Carves – Frequency (♦):
- Brachydios Cortex – ♦♦♦♦♦
- Fine Brachydios Ebonshell – ♦♦♦♦
- Brachydios Pounder+ – ♦♦♦
- Brachydios Crown – ♦♦♦
- Brachydios Lash – ♦♦
- Brachydios – ♦
- Rewards – Frequency (♦):
- Fine Brachydios Ebonshell – ♦♦♦♦
- Brachydios Cortex – ♦♦♦♦
- Glowing Slime – ♦♦♦
- Brachydios Pounder+ – ♦♦♦
- Brachydios Crown – ♦♦♦
- Brachydios Lash – ♦♦
Useful info – This Legiana variant stays airborne for much longer than most hunters are used to. Clever hunters will make use of its frequent dive-bombing by setting barrel bomb traps. If enough damage is done to the monster, it can be knocked out of the sky. It is often accompanied by a Legiana, meaning that Dung Pods are especially useful.
Move(s) to keep an eye out for – The Shrieking Legiana’s most dangerous attacks are its dive-bomb attacks. While it is quite vulnerable during this attack, it deals high amounts of physical and ice damage, often leaving the player with low health and Iceblight. If you see it jump straight into the air, get out of the immediate area. Poison is just as effective on the Shrieking Legiana as it is on the Legiana that hunters are used to. Wearing the Iceproof mantle will be a lifesaver.
Locale(s) – Hoarfrost Reach
Elements & Ailments – Ice, Iceblight
Weaknesses & Resistances
- Elements
- Fire – ♦♦♦
- Water – ♦
- Thunder – ♦♦
- Ice – X
- Dragon – ♦
- Ailments
- Poison – ♦♦♦
- Sleep – ♦♦
- Paralysis – ♦♦
- Blast – ♦♦
- Stun – ♦♦
- Body Parts
- Head – Breakable (weak point)
- Cut damage – ♦♦♦
- Blunt damage – ♦♦♦
- Ammo damage – ♦♦♦
- Wings – Breakable (weak point)
- Cut damage – ♦♦♦
- Blunt damage – ♦♦
- Ammo damage – ♦
- Chest – (weak point)
- Cut damage – ♦
- Blunt damage – ♦
- Ammo damage – ♦♦♦
- Back – Breakable
- Tail – Breakable
- Head – Breakable (weak point)
Materials
- Dropped material – Obsidian Icetalon
- Head broken – Rimed Hide, Legiana Mantle (rare)
- Wings broken – Stark Wing
- Back broken – Rimed Hide, Legiana Mantle (rare)
- Tail broken – Legiana Tail Webbing+
- Carves – Frequency (♦):
- Rime Hide – ♦♦♦♦
- Legiana Shard – ♦♦♦♦♦
- Obsidian Icetalon – ♦♦♦♦
- Stark Wing – ♦♦♦
- Legiana Mantle – ♦
- Rewards – Frequency (♦):
- Rimed Hide – ♦♦♦♦
- Legiana Shard – ♦♦♦♦
- Obsidian Icetalon – ♦♦♦
- Stark Wing – ♦♦♦
- Legiana Tail Webbing+ – ♦♦♦
- Cryo Sac – ♦♦♦
Useful info – In a lot of ways, the Fulgur Anjanath behaves very similarly to its temperamental, fire-breathing cousin, until it charges up and becomes electrified. Similar to a Kirin, Fulgur Anjanath’s hide will harden when electrified, so aiming for focused blows to the head is recommended.
Move(s) to keep an eye out for – A move that is sure to get hunters is Fulgur Anjanath’s mucus spit. Hunters should also keep an eye on Fulgur Anjanath’s movements as it should load up a discharge manoeuvre. A Thunderproof mantle is highly recommended.
Locale(s) – Ancient Forest, Wildspire Waste, Coral Highlands, Rotten Vale, Elder’s Recess, Hoarfrost Reach
Elements & Ailments – Thunder, Thunderblight, Paralysis
Weaknesses & Resistances
- Elements – () when charged
- Fire – ♦♦
- Water – ♦♦ (♦♦♦)
- Thunder – X
- Ice – ♦♦♦ (♦♦)
- Dragon – ♦♦♦
- Ailments
- Poison – ♦♦
- Sleep – ♦♦
- Paralysis – ♦♦
- Blast – ♦
- Stun – ♦♦
- Body Parts
- Head – Breakable (weak point)
- Cut damage – ♦♦♦
- Blunt damage – ♦♦♦
- Ammo damage – ♦♦
- Legs – Breakable
- Tail – Severable (weak point)
- Cut damage – ♦♦
- Blunt damage – ♦♦♦
- Ammo damage – ♦♦♦
- Head – Breakable (weak point)
Materials
- Dropped material – Lightning Sac
- Head broken – Fulgur Anjanath Hardfang, Fulgur Anjanath Mantle (rare)
- Legs broken – Fulgur Anjanath Shard
- Tail carved – Fulgur Anjanath Lash, Fulgur Anjanath Mantle (rare)
- Carves – Frequency (♦):
- Fulgur Anjanath Thickfur – ♦♦♦♦
- Fulgur Anjanath Sharf – ♦♦♦♦♦
- Fulgur Anjanath Hardfang – ♦♦♦
- Heavy Fulgur Anjanath Nosebone – ♦♦♦♦
- Fulgur Anjanath Mantle – ♦
- Rewards – Frequency (♦):
- Fulgur Anjanath Thickfur – ♦♦♦♦
- Fulgur Anjanath Shard – ♦♦♦♦
- Heavy Fulgur Anjanath Nosebone – ♦♦♦
- Fulgur Anjanath Lash – ♦♦♦
- Lightning Sac – ♦♦♦♦
Useful info – Unlike its cousin, the Acidic Anjanath does not have any elemental properties. Instead, it uses the corrosive fluid which crystallises on its tail to spray acid when it swings its tail. It behaves remarkably different to the standard Glavenus.
Move(s) to keep an eye out for – Hunters would be smart to avoid being hit by the Acidic Glavenus’ tail, as well as the acidic mist that gets sprayed with each swing, as each hit can apply the defence down debuff. Also be wary that the Acidic Glavenus will use its tail a lot more like a sword, with thrusting manoeuvres thrown into the mix to catch hunters off-guard.
Locale(s) – Rotten Vale
Elements & Ailments – Defence Down
Weaknesses & Resistances
- Elements – () when crystallised
- Fire – ♦♦♦
- Water – ♦
- Thunder – ♦♦
- Ice – ♦
- Dragon – ♦♦ (♦)
- Ailments
- Poison – ♦♦
- Sleep – ♦♦
- Paralysis – ♦♦
- Blast – ♦♦
- Stun – ♦♦
- Body Parts
- Head – Breakable (weak point)
- Cut damage – ♦♦
- Blunt damage – ♦♦♦
- Ammo damage – ♦♦♦
- Neck – (weak point)
- Cut damage – ♦♦♦
- Blunt damage – ♦♦♦
- Ammo damage – ♦♦♦
- Back – Breakable
- Forelegs – Breakable
- Tail – Severable (weak point)
- Cut damage – ♦♦♦
- Blunt damage – ♦♦♦
- Ammo damage – ♦♦♦
- Head – Breakable (weak point)
Materials
- Dropped material – Honed Acidcryst
- Head broken – Acidic Glavenus Hardfang, Glavenus Mantle (rare)
- Back broken – Acidic Glavenus Spineshell
- Forelegs broken – Acidic Glavenus Shard
- Tail carved – Acidic Glavenus Tailedge, Glavenus Mantle (rare)
- Carves – Frequency (♦):
- Acidic Glavenus Shard – ♦♦♦♦♦
- Acidic Glavenus Cortex – ♦♦♦♦
- Acidic Glavenus Hardfang – ♦♦♦
- Acidic Glavenus Spineshell – ♦♦♦
- Acidic Glavenus Tailedge – ♦♦
- Glavenus Mantle – ♦
- Rewards – Frequency (♦):
- Acidic Glavenus Cortex – ♦♦♦♦
- Acidic Glavenus Shard – ♦♦♦♦
- Honed Acidcryst – ♦♦♦
- Acidic Glavenus Hardfang – ♦♦♦
- Acidic Glavenus Spineshell – ♦♦♦
- Acidic Glavenus Tailedge – ♦♦
Useful info – This hyper-aggressive subspecies of Odogaron can be quite the handful normally but once it has eaten it will kick things up a notch and go into a frenzy. When frenzied, this fanged wyvern will unleash a myriad of dragon elemental attacks. When in this state, hitting the Ebony Odogaron with its dragon elemental attacks will help calm the monster. It’s best to prevent this monster from feeding.
Move(s) to keep an eye out for – You more or less have to be careful of the elemental attacks it does or risk being afflicted with Dragonblight, nullifying the elemental or status properties of your weapons. The Ebony Odogaron still does apply bleeding with its claws, like its red-coloured cousin.
Locale(s) – Ancient Forest, Wildspire Waste, Coral Highlands, Rotten Vale, Elder’s Recess, Hoarfrost Reach
Elements & Ailments – Dragon, Dragonblight, Bleeding
Weaknesses & Resistances
- Elements
- Fire – ♦♦
- Water – ♦♦♦
- Thunder – ♦♦
- Ice – ♦♦
- Dragon – ♦
- Ailments
- Poison – ♦♦♦
- Sleep – ♦♦
- Paralysis – ♦♦♦
- Blast – ♦♦
- Stun – ♦♦
- Body Parts
- Head – Breakable (weak point)
- Cut damage – ♦♦♦
- Blunt damage – ♦♦♦
- Ammo damage – ♦♦♦
- Forelegs – Breakable (weak point)
- Cut damage – ♦
- Blunt damage – ♦♦
- Ammo damage – ♦
- Legs – Breakable
- Tail – Severable (weak point)
- Cut damage – ♦♦
- Blunt damage – ♦
- Ammo damage – ♦♦
- Head – Breakable (weak point)
Materials
- Dropped material – Ebony Odogaron Shard
- Head broken – Ebony Odogaron Hardfang, Ebony Odogaron Mantle (rare)
- Forelegs broken – Ebony Odogaron Hardclaw
- Legs broken – Hard Ebony Odogaron Sinew
- Tail carved – Ebony Odogaron Lash, Ebony Odogaron Mantle (rare)
- Carves – Frequency (♦):
- Hard Ebony Odogaron Sinew – ♦♦♦♦
- Ebony Odogaron Shard – ♦♦♦♦♦
- Ebony Odogaron Hardclaw – ♦♦♦♦
- Ebony Odogaron Hardfang – ♦♦♦
- Ebony Odogaron Mantle – ♦
- Rewards – Frequency (♦):
- Hard Ebony Odogaron Sinew – ♦♦♦♦♦
- Ebony Odogaron Shard – ♦♦♦♦
- Ebony Odogaron Hardclaw – ♦♦♦
- Ebony Odogaron Lash – ♦♦♦
- Nourishing Extract – ♦♦♦
Useful info – Known as the Iceborne Elder Dragon, it has the power to summon ice out of thin air. Hunters will find that the more ice that is broken off its body, the less effective and common its freezing breath will be. Velkhana will leave walls of ice all over the area where it’s fighting, these can be broken to create platforms which are perfect for attempting mounting manoeuvres. Torch Pods are especially useful in this regard.
Move(s) to keep an eye out for – Most of Velkhana’s moves are pretty readable, except for a couple. One move which it likes to use frequently is its straight ice breath. Make sure you listen to the cue so you can roll out of the ice breath accordingly – this move will be expanded to a move which is repeated an extra time as the fight goes on. Its other big move is its frost nova. Velkhana will use its ice breath in a circular motion then proceed to focus its breath downward, freezing a large area. The Iceproof mantle is highly recommended as well as some Nulberries and a fire weapon.
Locale(s) – Hoarfrost Reach
Elements & Ailments – Ice, Iceblight
Weaknesses & Resistances
- Elements
- Fire – ♦♦♦
- Water – ♦
- Thunder – ♦♦
- Ice – X
- Dragon – ♦♦
- Ailments
- Poison – ♦♦
- Sleep – ♦
- Paralysis – ♦
- Blast – ♦♦♦
- Stun – ♦
- Body Parts
- Head – Breakable (weak point)
- Cut damage – ♦♦♦
- Blunt damage – ♦♦♦
- Ammo damage – ♦♦♦
- Wings – Breakable (weak point)
- Cut damage – ♦♦
- Blunt damage – ♦♦
- Ammo damage – ♦
- Tail – Severable (weak point)
- Cut damage – ♦♦
- Blunt damage – ♦♦
- Ammo damage – ♦♦
- Head – Breakable (weak point)
Materials
- Dropped material – Velkhana Hardclaw
- Head broken – Velkhana Crownhorn, Velkhana Crystal (rare)
- Wings broken – Velkhana Fellwing
- Tail carved – Velkhana Lash, Velkhana Crystal (rare)
- Carves – Frequency (♦):
- Crystal Shard – ♦♦♦♦♦
- Velkhana Cortex – ♦♦♦♦
- Velkhana Hardclaw – ♦♦♦
- Velkhana Crownhorn – ♦♦
- Velkhana Fellwing – ♦♦♦
- Velkhana Crystal – ♦
- Rewards – Frequency (♦):
- Velkhana Cortex – ♦♦♦♦
- Crystal Shard – ♦♦♦♦
- Velkhana Hardclaw – ♦♦♦
- Velkhana Lash – ♦♦♦
- Large Elder Dragon Bone – ♦♦
- Pure Dragon Blood – ♦♦♦
Useful info – This variant of the flying wyvern affectionately known as the B-52 Bomber packs a punch with its enhanced explosive pods. When enraged, its scales go from glowing bright red to glowing a bluish white colour, indicating that it means business. Hunters would do well to focus attacks on the enhanced scales in an effort to weaken the monster – Slinger ammo like Puddle Pods, Crystalburst and Scatternuts are effective if you are out of options.
Move(s) to keep an eye out for – Much like the normal Bazelgeuse, the Seething Bazelgeuse’s most dangerous attack is its explosive pods. Covering a much larger area and dealing significantly higher damage, this is one you want to ensure you are at a distance from. Be sure to pack your Fireproof mantle.
Locale(s) – Elder’s Recess
Elements & Ailments – Fire, Fireblight
Weaknesses & Resistances
- Elements
- Fire – X
- Water – ♦
- Thunder – ♦♦
- Ice – ♦♦♦
- Dragon – ♦
- Ailments
- Poison – ♦♦
- Sleep – ♦♦♦
- Paralysis – ♦♦
- Blast – ♦
- Stun – ♦♦
- Body Parts
- Head – Breakable (weak point)
- Cut damage – ♦♦
- Blunt damage – ♦♦
- Ammo damage – ♦♦
- Chest – (weak point)
- Cut damage – ♦♦
- Blunt damage – ♦♦
- Ammo damage – ♦♦
- Wings – Breakable
- Back – Breakable
- Tail – Severable (weak point)
- Cut damage – ♦♦♦
- Blunt damage – ♦♦♦
- Ammo damage – ♦♦♦
Materials
- Dropped material – Bazelgeuse Shard
- Head broken – Distilled Blast Fluid, Bazelgeuse Mantle (rare)
- Wings broken – Scorchwing Silverwing
- Back broken – Flickering Silvershell, Bazelgeuse Mantle (rare)
- Tail carved – Bazelgeuse Flail, Bazelgeuse (rare)
- Carves – Frequency (♦):
- Bazelgeuse Shard – ♦♦♦♦♦
- Flickering Silvershell – ♦♦♦♦
- Bazelgeuse Hardclaw – ♦♦♦
- Distilled Blast Fluid – ♦♦♦
- Scorching Silverwing – ♦♦♦
- Bazelgeuse Mantle – ♦
- Rewards – Frequency (♦):
- Flickering Silvershell – ♦♦♦♦
- Bazelgeuse Shard – ♦♦♦♦
- Distilled Blast Fluid – ♦♦♦
- Bazelgeuse Hardclaw – ♦♦♦
- Scorching Silverwing – ♦♦♦
- Bazelgeuse Flail – ♦♦
- Bazelgeuse Gem – ♦
Useful info – This Elder Dragon variant brings with it some new challenges for the hunter to face, namely the Effluvium spores. Hunters should try and break as many of the spores on the monster’s body as possible as this will reduce the activity of them as a whole. Breaking the spores on the monster’s head will enable the use of Flash Pods.
Move(s) to keep an eye out for – Blackveil Vaal Hazak does not have many moves that are particularly dangerous. Much like the regular Vaal Hazak, the breath attack is normally its most dangerous attack. Where the Blackveil Vaal Hazak does differ, however, is with the aforementioned spores. It will cover the field in spores and hunters will find that not only do these spores deal high amounts of damage, they also apply Effluvium and will continue to do so until they expire or the fight is moved to somewhere else. Breaking those spores on the monster is a must. The Immunity mantle is quite effective at minimising the amount of times you are afflicted by Effluvia.
Locale(s) – Ancient Forest, Rotten Vale
Elements & Ailments – Effluvia
Weaknesses & Resistances
- Elements
- Fire – ♦♦
- Water – X
- Thunder – ♦
- Ice – ♦
- Dragon – ♦♦
- Ailments
- Poison – ♦
- Sleep – ♦
- Paralysis – ♦
- Blast – ♦♦
- Stun – ♦
- Body Parts
- Head – Breakable (weak point)
- Cut damage – ♦♦♦
- Blunt damage – ♦♦♦
- Ammo damage – ♦♦♦
- Spores – (weak point)
- Cut damage – ♦♦♦
- Blunt damage – ♦♦
- Ammo damage – ♦♦
- Forelegs – Breakable
- Chest – Breakable
- Tail – Severable (weak point)
- Cut damage – ♦♦
- Blunt damage – ♦
- Ammo damage – ♦
- Head – Breakable (weak point)
Materials
- Dropped material – Deathweaver Membrane, Large Elder Dragon Gem (rare)
- Head broken – Shadowpierce Fang
- Forelegs broken – Vaal Hazak Hardclaw
- Chest broken – Vaal Hazak Fellwing
- Tail carved – Vaal Hazak Flail
- Carves – Frequency (♦):
Vaal Hazak Cortex – ♦♦♦♦
Deceased Shard – ♦♦♦♦♦
Vaal Hazak Hardclaw – ♦♦♦
Shadowpierce Fang – ♦♦♦
Vaal Hazak Fellwing – ♦♦
Large Elder Dragon Gem – ♦ - Rewards – Frequency (♦):
Vaal Hazak Cortex – ♦♦♦♦
Deceased Shard – ♦♦♦
Vaal Hazak Fellwing – ♦♦♦
Deathweaver Membrane – ♦♦
Vaal Hazak Flail – ♦♦♦
Large Elder Dragon Bone – ♦♦
Pure Dragon Blood – ♦♦♦
Vaal Hazak Gem – ♦
Useful info – One of the more unique and versatile Elder Dragons ever sighted in the New World, Namielle has the ability to control water and lightning. It possesses the ability to electrify pools of water surrounding it, converting the water in the steam, explosively. As it secretes more and more water, creating more and more pools of water, it becomes increasingly vulnerable to damage. Hunters can use Brightmoss and other Slinger ammo to remove the pools of water.
Move(s) to keep an eye out for – One of the more obnoxious things to deal with when it comes to fighting Namielle is the pools of water that it leaves on the floor. At any time it can reabsorb that water and hunters will lose their footing when this is happening if they are caught in the current. The best counter for this is the Waterproof mantle or using Brightmoss to remove nearby pools. Also be wary of its lightning attacks, especially when near water, as the steam explosions can cause high damage and either afflict you with Waterblight or Thunderblight. While the Thunderproof mantle can help, the Waterproof mantle outweighs it in its usefulness with this monster.
Locale(s) – Coral Highlands
Elements & Ailments – Water, Thunder, Waterblight, Thunderblight, Paralysis
Weaknesses & Resistances
- Elements
- Fire – ♦♦♦
- Water – X
- Thunder – X
- Ice – ♦
- Dragon – ♦♦
- Ailments
- Poison – ♦♦♦
- Sleep – ♦
- Paralysis – ♦
- Blast – ♦♦♦
- Stun – ♦♦
- Body Parts
- Head – Breakable (weak point)
- Cut damage – ♦♦♦
- Blunt damage – ♦♦♦
- Ammo damage – ♦♦♦
- Forelegs – Breakable (weak point)
- Cut damage – ♦♦♦
- Blunt damage – ♦♦♦
- Ammo damage – ♦♦
- Chest – (weak point)
- Cut damage – ♦♦
- Blunt damage – ♦♦♦
- Ammo damage – ♦♦♦
- Wings – Breakable
- Tail – Severable
Materials
- Dropped material – Namielle Finehide
- Head broken – Namielle Whisker, Large Elder Dragon Gem (rare)
- Forelegs broken – Namielle Hardclaw
- Wings Broken – Namielle Fellwing
- Tail carved – Namielle Lash, Large Elder Dragon Gem (rare)
- Carves – Frequency (♦):
- Namielle Finehide – ♦♦♦♦♦
- Namielle Hardclaw – ♦♦♦♦
- Namielle Fellwing – ♦♦♦♦
- Namielle Whisker – ♦♦♦
- Large Elder Dragon Gem – ♦
- Rewards – Frequency (♦):
- Namielle Hardclaw – ♦♦♦♦
- Namielle Finehide – ♦♦♦
- Namielle Whisker – ♦♦
- Namielle Fellwing – ♦♦♦
- Namielle Lash – ♦♦♦
- Large Elder Dragon Bone – ♦♦♦
- Pure Dragon Blood – ♦♦
Useful info – Hunters would be wise to prevent this Deviljho variant from feeding as the more it feeds, the stronger it becomes. It’s especially weak to blows to the head and hunters struggling to manage its aggressive nature can lure it to large monsters – it will ignore the hunter if there is a large monster nearby.
Move(s) to keep an eye out for – Savage Deviljho has very erratic behaviour compared to the normal Jho. It uses its Dragon damage far more which can mean bad things for hunters relying on affinity to pump out that little extra bit of damage. It also uses Defence Down far more than what hunters may be used to. The Dragonproof mantle and Might Seeds are recommended.
Locale(s) – Ancient Forest, Wildspire Waster, Coral Highlands, Rotten Vale, Elder’s Recess, Hoarfrost Reach
Elements & Ailments – Dragon, Dragonblight, Defence Down
Weaknesses & Resistances
- Elements
- Fire – ♦♦
- Water – ♦♦
- Thunder – ♦♦♦
- Ice – ♦
- Dragon – ♦♦♦
- Ailments
- Poison – ♦♦♦
- Sleep – ♦♦♦
- Paralysis – ♦♦♦
- Blast – ♦♦
- Stun – ♦♦
- Body Parts
- Head – Breakable (weak point)
- Cut damage – ♦♦♦
- Blunt damage – ♦♦♦
- Ammo damage – ♦♦
- Chest – Breakable (weak point)
- Cut damage – ♦♦♦
- Blunt damage – ♦♦♦
- Ammo damage – ♦♦
- Tail – Severable (weak point)
- Cut damage – ♦♦
- Blunt damage – ♦♦
- Ammo damage – ♦
- Head – Breakable (weak point)
Materials
- Dropped material – Black Blood
- Head broken – Vile Fang, Deviljho Crook (rare)
- Chest broken – Deviljho Shard (rare)
- Tail carved – Deviljho Flail, Deviljho Crook (rare)
- Carves – Frequency (♦):
- Deviljho Blackpiel – ♦♦♦♦♦
- Deviljho Shard – ♦♦♦♦
- Deviljho Ripper – ♦♦♦
- Vile Fang – ♦♦♦
- Black Blood – ♦♦♦
- Deviljho Crook – ♦
- Rewards – Frequency (♦):
- Deviljho Blackpiel – ♦♦♦♦
- Deviljho Shard- ♦♦♦♦
- Black Blood – ♦♦♦
- Deviljho Ripper – ♦♦♦
- Deviljho Flail – ♦♦♦
- Vile Fang – ♦♦
- Deviljho Gem – ♦
Useful info – The Nergigante Variant’s spikes are remarkably tougher than what most hunters are used to. As it becomes weaker the spikes grow tougher. In addition to these spikes, it also has metallic spikes which do not regenerate. Breaking these will help with mitigating the lethality of the Ruiner Nergigante.
Move(s) to keep an eye out for – Ruiner Nergigante has more charges than its cousin and it changes the notorious dive bomb for a bigger and more devastating groundslam. Pretty much all its charges shoot out spikes which deal high damage.
Need to hit MR99 and fight this monster more for more info
Useful info – Known as the Elderwyrm, Shara Ishvalda has two forms. Explosive damage like Barrel Bombs and Bomb Pods are especially useful in the first phase, as they strip the monster of its rock armour.
Move(s) to keep an eye out for – Shara Ishvalda is incredibly easy to deal with in its first phase, its second phase is where it can be increasingly obnoxious to fight. Most of its physical attacks aren’t that threatening, but ranged attacks are dangerous – especially its explosion.
Locale(s) – Origin Isle
Elements & Ailments – N/A
Weaknesses & Resistances
- Elements
- Fire – ♦
- Water – ♦♦
- Thunder – X
- Ice – ♦♦♦
- Dragon – ♦
- Ailments – () second phase
- Poison – ♦♦
- Sleep – X
- Paralysis – ♦
- Blast – ♦♦ (♦♦♦)
- Stun – ♦
- Body Parts – first phase
- Head – Breakable (weak point)
- Cut damage – ♦♦
- Blunt damage – ♦♦
- Ammo damage – ♦♦♦
- Forelegs – Breakable
- Chest – Breakable (weak point)
- Cut damage – ♦♦
- Blunt damage – ♦♦
- Ammo damage – ♦♦
- Back – Breakable (weak point)
- Cut damage – ♦♦♦
- Blunt damage – ♦♦♦
- Ammo damage – ♦♦
- Wings – Breakable
- Head – Breakable (weak point)
- Body Parts – second phase
- Head – Breakable Twice (weak point)
- Forelegs – Breakable
- Chest – (weak point)
- Cut damage – ♦♦
- Blunt damage – ♦♦
- Ammo damage – ♦♦
- Wings – (weak point)
- Cut damage – ♦♦
- Blunt damage – ♦♦
- Ammo damage – ♦♦♦
Materials
- Dropped material – Shara Ishvalda Petalstone
- Head broken – Shara Ishvalda Tenderscale, Shara Ishvalda Gem (rare)
- Scalp carved – Shara Ishvalda Tenderplate, Share Ishvalda Gem (rare)
- Forelegs broken (first phase) – Shara Ishvalda Petalstone
- Forelegs btoken – Shara Ishvalda Tenderclaw
- Wings broken (first phase only) – Shara Ishvalda Tenderclaw
- Carves – Frequency (♦):
- Shara Ishvalda Tenderscale – ♦♦♦♦♦
- Shara Ishvalda Boulderplate – ♦♦♦♦
- Shara Ishvalda Petalstone – ♦♦♦♦
- Shara Ishvalda Tenderclaw – ♦♦♦
- Shara Ishvalda Gem – ♦
- Rewards – Frequency (♦):
- Shara Ishvalda Boulderplate – ♦♦♦♦
- Shara Ishvalda Tenderscale – ♦♦♦♦
- Shara Ishvalda Petalstone – ♦♦♦
- Shara Ishvalda Tenderclaw – ♦♦♦
- Large Elder Dragon Bone – ♦♦
- Pure Dragon Blood – ♦♦
- Shara Ishvalda Gem – ♦
Useful info – Featuring some more unique traits, hunters need to be careful when laying down Shock Traps as they will only work when the monster is in its normal state. If a Shock Trap is used in its supercharged state the fanged wyvern will break said trap. While supercharged, key points on the monster become noticeably soft and susceptible to damage. Hunters hoping to forge gear using Zinogre material will need to use the capture net on its back while it is toppled to gather additional Fulgurbugs.
Move(s) to keep an eye out for – Zinogre is quite an aggressive monster to fight. Take care when trying to stagger it while it charges as it could reach a supercharged state which brings down lightning in a close proximity to the monster. It will also send out balls of electricity. Be sure to pack some Nulberries and your Thunderproof mantle.
Locale(s) – The Guiding Lands
Elements & Ailments – Thunder, Thunderblight, Paralysis
Weaknesses & Resistances
- Elements
- Fire – ♦
- Water – ♦♦
- Thunder – X
- Ice – ♦♦♦
- Dragon – ♦
- Ailments
- Poison – ♦♦
- Sleep – ♦♦
- Paralysis – ♦
- Blast – ♦♦
- Stun – ♦♦
- Body Parts
- Head – Breakable (weak point)
- Cut damage – ♦♦♦
- Blunt damage – ♦♦♦
- Ammo damage – ♦♦♦
- Forelegs – Breakable (weak point)
- Cut damage – ♦♦
- Blunt damage – ♦♦
- Ammo damage – ♦♦
- Back – Breakable
- Tail – Severable (weak point)
- Cut damage – ♦♦
- Blunt damage – ♦♦
- Ammo damage – ♦♦
- Head – Breakable (weak point)
Materials
- Dropped material – Fulgurbug
- Head broken – Zingore Hardhorn, Zinogre Skymerald (rare)
- Forelegs broken – Zinogre Hardclaw
- Back broken – Zinogre Deathly Shocker
- Tail carved – Zingore Lash, Zingore Skymerald (rare)
- Carves – Frequency (♦):
- Zingore Electrofur+ – ♦♦♦♦
- Zingore Cortex – ♦♦♦♦♦
- Zinogre Deathly Shocker – ♦♦♦
- Zingore Lash – ♦♦
- Zinogre Hardclaw – ♦♦♦
- Zinogre Skymerald – ♦
- Rewards – Frequency (♦):
- Zinogre Electrofur+ – ♦♦♦♦
- Zinogre Cortex – ♦♦♦♦
- Zinogre Deathly Shocker – ♦♦♦
- Zinogre Hardclaw – ♦♦♦
- Lightning Sac – ♦♦♦
- Zinogre Hardhorn – ♦♦
Useful info – An incredibly mobile bird wyvern which moves with enough aggression and ferocity to break pitfall traps when enraged. Baiting its beak attacks will ensure its exhaustion, allowing for the hunter to deal damage and break body parts.
Move(s) to keep an eye out for – Be sure to avoid its beak attacks as they have a high chance of stunning you. It will also spit fireballs which deal a hefty amount of damage. Severing the Yian Garuga’s tail will also prove effective as it will inflict you with poison, and it uses this frequently.
Locale(s) – The Guiding Lands
Elements & Ailments – Fire, Fireblight, Poison
Weaknesses & Resistances
- Elements
- Fire – X
- Water – ♦♦♦
- Thunder – X
- Ice – ♦
- Dragon – ♦♦
- Ailments
- Poison – ♦
- Sleep – ♦
- Paralysis – ♦♦
- Blast – ♦♦♦
- Stun – ♦♦
- Body Parts
- Ears & Beak – Breakable (weak point)
- Cut damage – ♦♦♦
- Blunt damage – ♦♦♦
- Ammo damage – ♦♦♦
- Wings – Breakable
- Chest – Breakable
- Tail – Severable (weak point)
- Cut damage – ♦♦♦
- Blunt damage – ♦♦
- Ammo damage – ♦♦
- Tail spikes – (weak point)
- Cut damage – ♦♦
- Blunt damage – ♦♦
- Ammo damage – ♦♦
- Ears & Beak – Breakable (weak point)
Materials
- Dropped material – Garuga Shard
- Ears broken – Garuga Auricle
- Beak broken – Fancy beak
- Wings broken – Garuga Fellwing
- Chest broken – Garuga Silverpelt
- Tail carved – Garuga Lash, Fey Wyvern Gem (rare)
- Carves – Frequency (♦):
- Garuga Shard – ♦♦♦♦♦
- Garuga Cortex – ♦♦♦♦
- Garuga Silverpelt – ♦♦♦
- Fancy Beak – ♦♦
- Garuga Fellwing – ♦♦♦
- Fey Wyvern Gem – ♦
- Rewards – Frequency (♦):
- Garuga Cortex – ♦♦♦♦
- Garuga Shard – ♦♦♦♦
- Garuga Silverpelt – ♦♦♦
- Fancy Beak – ♦♦♦
- Garuga Fellwing – ♦♦
- Garuga Lash – ♦♦
- Conflagrant Sac – ♦♦♦
Useful info – The Tempered version of the Yian Garuga, it is missing an ear and has scars across its body from fighting. It behaves remarkably differently to a standard Yian Garuga and can easily catch a hunter off-guard.
Move(s) to keep an eye out for – One of the key moves to look out for with the Scarred Yian Garuga is its fireball shower. It will jump into the air and spit multiple fireballs all over the place, the increased damage from it being a tempered monster makes this move even trickier to deal with. The same rules still apply with its beak attacks and poison tail, except the tail inflicts you with Noxious Poison. The Fireproof mantle is recommended for this monster.
Locale(s) – The Guiding Lands
Elements & Ailments – Fire, Fireblight, Noxious Poison
Weaknesses & Resistances
- Elements
- Fire – X
- Water – ♦♦♦
- Thunder – X
- Ice – ♦
- Dragon – ♦♦
- Ailments
- Poison – ♦
- Sleep – ♦
- Paralysis – ♦♦
- Blast – ♦♦♦
- Stun – ♦♦
- Body Parts
- Ears & Beak – Breakable (weak point)
- Cut damage – ♦♦♦
- Blunt damage – ♦♦♦
- Ammo damage – ♦♦♦
- Wings – Breakable
- Chest – Breakable
- Tail – Severable (weak point)
- Cut damage – ♦♦♦
- Blunt damage – ♦♦
- Ammo damage – ♦♦
- Tail spikes – (weak point)
- Cut damage – ♦♦
- Blunt damage – ♦♦
- Ammo damage – ♦♦
- Ears & Beak – Breakable (weak point)
Materials
- Dropped material – Garuga Shard
- Ears broken – Garuga Auricle
- Beak broken – Fancy beak
- Wings broken – Garuga Fellwing
- Chest broken – Garuga Silverpelt
- Tail carved – Garuga Lash, Fey Wyvern Gem (rare)
- Carves – Frequency (♦):
- Garuga Shard – ♦♦♦♦♦
- Garuga Cortex – ♦♦♦♦
- Garuga Silverpelt – ♦♦♦
- Fancy Beak – ♦♦
- Garuga Fellwing – ♦♦♦
- Fey Wyvern Gem – ♦
- Rewards – Frequency (♦):
- Scratched Shell – ♦♦♦♦
- Garuga Cortex – ♦♦♦
- Garuga Shard – ♦♦♦
- Garuga Silverpelt – ♦♦♦
- Fancy Beak – ♦♦♦
- Garuga Fellwing – ♦♦
- Garuga Lash – ♦♦
Need to fight for info
Need to fight for info
Need to fight for info
Jordan lives and breathes Dark Souls, even though his favourite game is Bloodborne. He takes pride in bashing his face on walls and praising the sun. Hailing from the land of tacos, he is the token minority for WellPlayed.


