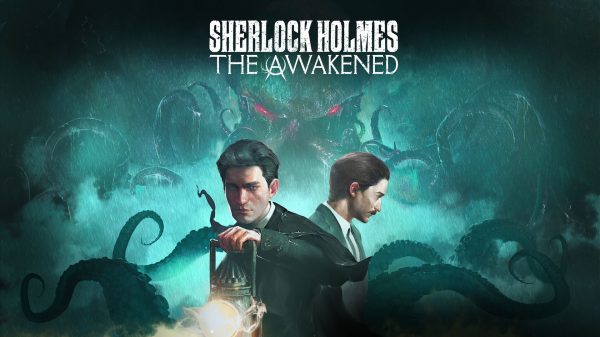
Frogwares released the remake of its 2008 (and 2009) title Sherlock Holmes The Awakened on April 11, 2023. The remake was a complete rebuild of the original game, blending gameplay mechanics and story elements from Sherlock Holmes Chapter One with the original version’s premise and narrative. If you’ve stumbled upon this walkthrough then you’ve likely hit a snag during your playthrough of Sherlock Holmes The Awakened. Luckily, we’ve rolled credits and can help guide you forward with a gentle nudge or you can use this walkthrough all the way through to the ending. As a note, this walkthrough only covers the main story missions. If you want to know what we thought of the game, you can read our Sherlock Holmes The Awakened review.
Chapter 1 – The Shadow of London
Move around the room and look at the nearby table. Inspect the newspaper, the “Visit Barnes Bookshop” photo, and the envelope on the table. Rotate the photo and the envelope until you can interact with them. For the photo, you should be able to interact with the “Visit Barnes Bookshop” section. For the envelope, flip it around until you see writing.
Objective: The Strand is missing
Leave the room and as you head down the stairs, you are prompted to change your clothes. Open your Casebook and select the Wardrobe option at the top of the bar (at the right end). Go to the Hats section and select any hat.
Exit the building and once outside, inspect the trash can on your right. Inspect the thin Cactus Spine, then focus on the newspaper it is under to find The Strand.
After finishing, you get a short tutorial about running. There’s a boy who claims to have a new copy of the newspaper. Approach him and start a conversation. Ask about the missing newspaper to open a new set of options. Ask about what the man did to the newspaper, the man himself, and where he was headed.
Open your Casebook and head to the Mind Palace (at the left end). Select the red neuron under “Who ruined “The Strand”?” to start piecing evidence together. You are looking for one blue and one green item. Switch between item colours to match the correct inputs. The items you are looking for are:
- Newsboy’s testimony (green)
- Book from Barnes (blue)
Leave the Mind Palace and the menu after pinning the Book from Barnes evidence. To find Barnes’ Bookshop, head east of the boy you talked to, then west when you see Lucky’s Bar (or a white horse). Keep going west until you see a building with a green sign saying “Barnes’ Bookshop”.
Go inside and turn right to see Barnes, interacting with him to observe and create a portrait. You must rotate around Barnes to find different places to inspect. Hold and examine his eyes, his fingers, his lower right pants leg, and his left shoe. After inspection, you can determine if he’s a Blackmail victim or a Workaholic. “Workaholic” is the correct answer.
After the scene, head back to the front desk and search the pile of books. If you can’t find them, highlight the scene with the Analyze surroundings and it should have a yellow dot. At the pile of books, search the paper titled “Everlasting Plants” and the central tower of books. It should have a bright orange book under the “Basics of Cryptoanalysis”.
Go back to the entrance and search the glass cabinet near the stairs. Look across the street at the other building, look at the vase, and then at the books below the vase.
Return to Barnes’ room and head to the right. Inspect the wooden ladder to find that it is broken.
Leave Barnes’ Bookshop and head to the flower shop on the opposite side. Inspect the flowers, searching the red roses, white roses, and the cactus. While inspecting the cactus, rotate it until you see a crack in the flowerpot. Search the opposite side of the cactus to inspect the cactus spines.
After a brief scene, inspect the flower shop owner, Mrs Flemming. Inspect her eyes, lips, the brooch on her left, collar, and right shoe. You can decide if she is Still grieving or if she is Ready to move on. “Ready to move on” is the correct answer.
Choose to Provide Evidence and bring up the Cactus in a cracked pot, Dead flowers on display, and then the Character Portrait: Mr Barnes.
Head to the Mind Palace through the Casebook and select the red neuron with “Why is Barnes acting so strangely?” You need one yellow, blue, and green item. The items you need are:
- Cactus in a cracked pot (blue)
- Dead flowers on display (yellow)
- Mrs Flemming on Barnes (green)
Return to Mr Barnes’ room for a conversation. Bring up Mrs Flemming’s new cactus, then My paper was ruined. You can then choose This isn’t really my area…or I know what to do. Regardless of your choice, you get The Strand – September 28, 1882 in the end.
Objective: Head to Stenwick’s Manor
After a brief scene, your next goal is to visit Stenwick’s Manor. Just head east when you regain control and go through the gate with a blue mailbox on its right.
Ask two questions to the police officer, then follow up by asking all six questions about Kimihia. After you are done, head around to the back of the mansion by going around the left side. As you approach the shack, you are informed of using Concentration to focus on any wavy green circles you see. Some green circles will only appear if you pin the proper evidence beforehand.
Objective: Find Kimihia
Before you go inside the shack, look on the ground to your left to find your first set of tracks with a green circle. Inspect them to add Trail in Captain Stenwick’s garden to your clues. Pin the Trail to your evidence, then head left and use Concentration on a broken cart to update the clue. Head west of the broken cart to find a marble statue. Go around it and search the mark at its base. Inspect the mark to find Chewing tobacco remnants, a footprint below the mark, and finally another footprint while using Concentration.
Go back to the entrance of the shack and look left of the entrance to find a second set of tracks, along with some firewood. Examine them with Concentration to update the Trail clue.

Head to the left of the first set of tracks and search the lock at the end to find A lock with an unusual keyhole. Pin that to your evidence. Inside the shack, use Concentration on the keys near the entrance. They have a green circle thanks to the pinned evidence. This updates the unusual keyhole clue.
Search the ground and inspect the white cloth on the left and the fallen box on the right. Search a sack of grain to the right of the box for another inspection. Inspect the sack of grain itself, then a small navy spyglass near a shovel. Head to Kimihia’s bed and check the nearby table to find Clothes made of hessian. Search the shelf near the table to find the Nguru nose flute.
Near Kimihia’s bed is an ash pile. Search it twice (first time might be a generic response) to start inspecting. Inspect the bone on the left and the ashes in the centre. There is a brown spherical object at the north part of the ash pile; rotate it until you can interact and open the object to complete the inspection. Look out the window near the ash pile to find a drawing of a water spirit. Go outside the shack and head around the left side to find a cloth stuffed in a pipe. Inspect and rotate it to get the Cloth in the chimney clue.
Return to Captain Stenwick and discuss all the clues:
- Footprints in Captain Stenwick’s garden
- Chewing tobacco remnants
- A Lock with an unusual keyhole
- Clothes made of hessian
- Spyglass
You have enough evidence to recreate the scene. Turn on Concentration which activates Imagination, allowing you to begin recreating possibilities. You must get the correct sequence of events or you must start over.
There are five points in this imagination sequence:
- Near the sack of grain inside Kimihia’s shack
- Near the marble statue with the chewing tobacco mark
- Around the first set of tracks outside Kimihia’s shack
- Near the ash pile inside Kimihia’s shack
- The locked door west of the first set of tracks
The correct image for each sequence is:
- A wooden figure dragging Kimihia (third image)
- A wooden figure placing a spyglass near the statue (third image)
- A wooden figure putting Kimihia’s body on a cart and pushing it away (third image)
- A wooden figure stuffing cloth into the chimney (second image)
- A wooden figure trying to open the door (first image)
This gets you the Kimihia’s Abduction clue, which you should discuss with Captain Stenwick. Go through all the options and Captain Stenwick will start getting aggressive. You can say Do it yourself, then, respond with What did you call me?, or Remain silent. Whichever option you pick, you get the Abductor’s trail clue and can open the locked garden door.
Pin the Abductor’s trail clue, then unlock the door and head west. Follow the cart tracks until you find it abandoned at the roadside. Inspect the cart’s wheels, then the rope on the cart which provides the Sailor’s Knot clue. Finally, inspect the pouch on the ground to get the name Roy Solsby for the Calling Card clue. Rotate the pouch to find a substance on the back.
Search the ground to the right of the cart for another inspection. Inspect the horse droppings on the left, then move to the right and look at the cigarette butts above the top metal railing.
Head to the Mind Palace and you have two neurons to investigate. Start with “What are the notable features of the abductor?”, and use the following items:
- Sailor’s knot (blue)
- Spyglass (blue)
- Footprints in Captain Stenwick’s garden (yellow)
Now for the other neuron with “Where does Kimihia’s trail lead?”:
- The Strand – September 28, 1882 (blue)
- Wallet with saltpetre (blue)
- Abductor is a sailor (yellow)
You now have enough clues to go to the Port of London. Head straight down the trail until the path opens and you see some tracks going northwest. Follow the tracks to a cab (horse carriage) and talk to the driver to proceed. Make sure you have done everything you wanted, as you cannot return after doing so.
Chapter 2: The Blood-Red Night
Objective: Find Kimihia’s Whereabouts
Start by going to your Casebook and pinning Solsby’s calling card. Head up the stairs to The Cursed Mermaid and speak to a man eating out of a can at a nearby table. This tells you to go to the dockyard.
Go inside The Cursed Mermaid and talk to the barmaid at the counter. Ask about the shipyard event, then ask “We need help finding a man.” Present Solsby’s calling card as evidence, then observe the barmaid. Observe her chin, left breast pocket, stomach, and left trousers pocket. You can choose from Unaware of her pregnancy or Tries hiding her pregnancy. “Tries hiding her pregnancy” is the correct answer.
Before leaving The Cursed Mermaid, check the posters on the wall to the right of the barmaid. One of them is a Missing person poster, instructing you to look for Daya at the Shantytown. There’s a red rag over the house.
Leave The Cursed Mermaid and head straight until the path splits to the north and east. Head east to enter Shanty Town, then turn northwest when you see some red cloth in the distance. Make your way to the red cloth, then turn right to go inside. Go up to the boy and start a conversation, then ask all the questions. This gets you the Nepali boy’s testimony clue. Check the altar behind the boy to inspect the shelf. Look to the left for a bright white/silver circle which is the Ammonite pendant when you rotate it. Investigate the picture on the right to find the last item.
Go back to the path split and head north, crossing the bridge and through the open door. Continue going straight, following the path as it goes northeast until it splits to the left and right. Head left up the stairs, then go left again up the second set of stairs and follow the path. When you see the train, head left to enter Pier Three.
Continue going left and turn right to find a man looking over the ocean, which is Roy Solsby. Ask all the questions, then present Solsby’s calling card and the Nepali boy’s testimony. Observe Roy, looking at his hat, left hand, stomach, and right arm. You can decide if Roy is a Corrupt officer or a Thief. “Corrupt officer” is the right answer.
Return to The Cursed Mermaid and talk to the barmaid about a person with a metallic eye. This gets you information about “Dirty” Sommers, though you have no other information. Head to the Mind Palace and tackle “Who abducted Kimihia?”
The correct answers are:
- Barmaid’s testimony (green)
- Roy Solsby’s testimony (green)
- Nepali boy’s testimony (green)
- Character Portrait: Roy Solsby (yellow)
Return to Roy Solsby and confront him. During the confrontation, select the following:
- Kimihia’s abductor
- Solsby’s calling card
- Character Portrait: Roy Solsby
This gets you Roy Solsby’s testimony. Return to The Cursed Mermaid and confront the barmaid. During the confrontation, select the following:
- Kimihia’s abductor
- Roy Solsby’s testimony
- Character Portrait: Barmaid
Choose Perish the thought or What do you think? You get the Rusty key regardless of what you choose. Head right of the barmaid for a door you can now go through; just walk through it. Follow the stairs down to a room with a large table and inspect it. Look at the coins in the middle of the table, the sheet under the plate for the Invoice for sailcloth, then look up at the blackboard for the Hiring notice. Finally, turn on Concentration and inspect the right side of the table to get Strange symbols.
Head to the Mind Palace and tackle the “Where is Kimihia?” question. The correct answers are:
- Invoice for sailcloth (green)
- Roy Solsby’s testimony (green)
- Hiring notice (yellow)
This gives you Kimihia’s whereabouts as a clue. Head back to the stairs that brought you to Pier Three. Go up the stairs and go to the right this time to reach the Warehouses. Turn left to see some numbered warehouses along the way. Pin Kimihia’s whereabouts, then keep going left until you see a long wooden entranceway. Head right along the fence to find Warehouse 12, which has a red cross.
You must pick the lock by editing the lockpick through the external view. The internal view shows you whether the locks are properly aligned with the grey horizontal line. The left part of the lockpick requires three upward adjustments, the center requires four, and the right only needs two.
Inside the warehouse, head to the left and inspect the sailcloth falling out from the box. Look at the mouldy left side and the torn right side. Head behind the box and inspect the window. Inspect the scratches on the windowsill and the crowbar on the floor. Turn on Concentration and inspect the trail marks under the windowsill to finish.
Head to the northwest part of the warehouse floor and inspect a box to find a crank inside. Go up to the second floor and inspect the left mechanism (the right is stuck and unavailable). Search the centre and lower-centre parts of the mechanism to get the Lifting mechanism clue. Pin the Lifting mechanism, then go back down to the crank to pick it up. Use the crank on the Lifting mechanism, then go back down to the first floor where Watson is.
A hidden passage is revealed, which you must go down. Make sure you have done everything you want before going through it. Go down the stairs and keep following the path, even after the environment changes. Interact with the stone pedestal in the middle, then head to the end and look at the ground. It mentions the only way forward is the abyss, which means jumping off the sides.
When you do, you awaken on a different platform to find a floating rock. Rotate and interact with it to put it in your inventory. Jump off the platform and you will be back at the beginning. Go back to the stone pedestal and put the stone in, then interact with it to open the door. Go through the door but walk as you do, since running will automatically close the door.
In the new area, go straight a few steps and turn right, looking down to see a monster in a hole. Jump down into the monster to fall to a different level. Follow the path (there’s only one way to go), taking a left up the stairs when the path splits. At the top of the stairs, look to your left to see a symbol on the ground. Step on it and a bridge will form. Head back to the path split and cross the bridge, turning right to see a white eye. Use Concentration to shut it, then head left to go through the door. If the door keeps closing, just look back at the eye with Concentration to re-open it, then keep repeating until you are through.

You will find yourself in another area in front of a stone pedestal. There are five doors around the pedestal (not counting the locked door in front). Head through the southeast door, turn on Concentration and walk towards the next door. Go through the second door to grab one rock, then head back to the stone pedestal.
Go through the southwest door and use Concentration while walking forward. You should see footprints walking away on the ground. Turn around and you will see a white eye. While Concentration is active, the eye will be shut. Walk backwards until you go through the door, then turn around and grab the second rock.
Put the two stones on the pedestal, then go through the north door. It will move away from you, but head northwest to a white symbol on the ground. Step on it to lock a path to the door, then walk across and go through.
You now take control of Watson. Head down the passage and then go northeast up the stairs to reach Holmes. Shine the light on Holmes for a short scene and you will play as Holmes again.
Examine the body on the altar for an inspection. Look at the head and stomach. Use Concentration and check the chest and right hand. This provides the Unknown man on the altar clue. You must reconstruct a scene and must search other areas to do it properly. Turn around and examine the statue opposite the body. Keep inspecting until you can’t inspect the statue anymore.
Head to the right of the statue and search the corner for an inspection. Inspect the cloth and rope on the ground. Turn on Concentration and inspect the two markings on the walls. This gets you the Cross inside rectangle clue.
Head left of the statue to find an L-shaped table. Search the section with paper on it to start your first inspection. Search the box of pendants on the left, along with the Passport and Advertisement flyer in the middle, and finally the knife on the right. Look at both sides of the passport and knife to register the clues.
Inspect the other part of the L-shaped table. Look at the bottles in the northwest and the grey box on the right. Check inside the box and the box’s lid for the Tin box with Edelweiss clue.
Head down the steps and examine the area in front of the altar, looking at the drawings and a censer near the beds. Go to the left staircase leading to the altar and take a few steps back to see a box on your left. Inspect the box, searching the left side for a bloodstain and the crate’s right side. Turn on Concentration and examine the crate lid above the crate.
Head to the southeast corner of the room to find a pile of clothes you can inspect. Search the yellow striped pants at the bottom, and the clothes just above them.
You can now reconstruct the scenes. The altar is the first location, the area to the right of the statue is the second, while the area in front of the altar is the third. The box near the left staircase is the fourth, while the pile of clothes is the fifth.
The figures you are looking for are:
- One figure over the man, while the other figure is standing (second)
- A wooden figure approaching a man (third)
- A single wooden figure painting on the wall with an audience (second)
- Two wooden figures fighting in the box (second)
- One wooden figure ripping off clothes from the other (second)
After the scene, you are back at Baker Street. Head into the Mind Palace and solve the question “Who is the dead man on the altar?” The answers you want are:
- Advertisement flyer (green)
- Passport (green)
- Unknown man on the altar (yellow)
This unlocks a second neuron in the Mind Palace, for the question of “Where have the abducted been sent to?” The answers are:
- Tin box with edelweiss (blue)
- Cross inside rectangle (yellow)
- Warehouse 12 happenings (yellow)
You must now search the new Abductors’ route clue in the Archives. Follow the instructions to access the Archives, using the following answers:
- Location: Europe
- Date of Establishment: 1700s
- Field of Activity: Medicine
- Type of Organisation: Private facility
Either Field of Activity or Type of Organisation will suffice. You then head to Chapter 3.
Chapter 3 – The Mountains of Madness
As Watson, approach the front desk and speak to the receptionist. After a scene, Amos Colby will appear. You can mention he is a fraud or a celebrity, then watch the scenes that play out.
Head to the cell door and you must open it with a lock pick. There are four cylinders to adjust. The first cylinder needs two upwards adjustments, the second needs four, the third needs three, and the fourth needs one.
Follow the path through the jail until the path splits to the left and right. Head left and keep walking until a room opens on your left: the Apothecary. Inspect the table, searching the ingredients on the left, the machine on the centre-right, and finally the bottles on the right. Search behind the table to find a desk with the Block A Patients clue. Search the nearby fridge with Syringes and examine them to add them to your inventory. If you try to head through the open door in the room, you get noticed and get the Obstructed access to Block B clue.
Objective: Remove the Guard
Head back into the hallway and go forward, triggering a short scene that gives you the Patient hates the guards clue. The end of the hallway leads to the Storage Room and has another door that you must lock pick. There are five cylinders: the first is opened with one upward adjustment, the second with three, the third with two, the fourth with three, and the fifth with four.
In the next room, inspect the table on your right. Search the framed certificate and the toolbox. There will be a nearby box on the ground you can inspect. Search the envelope inside the box, then search the Metal tubes underneath after reading the envelope. You can search the area behind the box to find three different books.
Northwest of the box is a compartment with a crank you can inspect. Search the crank, the Old photograph on the bottom row, then search the bottom row again after taking the old photograph for the A working dumbwaiter clue. Search both sides of the old photograph to fully inspect it.
Go back to the initial path split shortly after you left your cell. Go right up the stairs to the Examination Room. Turn left and look at the map for Watson’s successful infiltration clue. Check the door to the left of the map to get the Blocked path upstairs clue. Turn left again to see the examination chair and a nearby table. Search the table to get the Bottle of sedative.
Head to the Mind Palace to answer “How to safely remove the Block B guard?” Your answers should be:
- Syringes (blue)
- Metal tubes (blue)
- A bottle of sedative (blue)
Return to the Storage Room and grab a metal tube from the box. Head back to the Apothecary and go close to the open doorway, interacting with the left side to begin. After the scene, inspect the body to get the Nurse Disguise. Before you leave, search the boxes to the right of the door. Search the bottle of sedative at the bottom and the Letter to Mr Schnitzer on the right.
Head through the door past the body and the path splits to the left and right. It doesn’t matter which path you take, they both lead to the same area and a scene will play. After the scene, turn around and go through the cell door. Go down the hallway and go right into the Laundry room. Inspect the furnace, searching its inside and the clothes on the left. Search the nearby locker in the room to find Heidi. Search both the doll’s chest and head to put it in your inventory.
Go back into the hallway and go left into the Restricted Area. Follow the path until it splits towards the left and right. Head left to find a room with four jail cells. The southwest jail cell has writing on the wall only seen with Concentration. The northeast cell requires Concentration to reveal something on the floor, which you can interact with to find a cross. Check the small table in the middle of the cells for an inspection. Search the envelope and the nearby bottle of sedative.
Go back to the path split and head right. As you go through the doorway, use Concentration and look to your left to find blood on the doorway. There is a nearby stretcher you can also examine using Concentration. Check the crate in the northwest, then the doors at the end. Turn away from the doors to find more boxes you can inspect. Search the left and right sides of the box’s interior, then use Concentration on the nearby box lid.
There’s also a non-bloody box nearby that you can inspect. Search the far left side to find a pendant, a hole in the upper left, the clothes on the left, and the bottle around the centre right. You now have all the information necessary to recreate the scene. There are three areas: the first is close to the doorway, the second is close to the large doors, and the third is close to the boxes you just searched.
The correct re-enactment figures are:
- Someone hitting a wooden figure as others leave (second)
- People receiving a box from a carriage (second)
- Someone pulling a stretcher while a wooden figure gets up (third)
You receive the Investigating the Edelweiss clue, which you should immediately pin.
Objective: Investigating the Edelweiss
Speak to Gerda from the earlier scene, telling her you have Heidi. Ask about the others and Gygax. Head back to the room where you reconstructed the scene and head to the southeast corner. There is white paint near a wall, which you can search with Concentration. Maintaining Concentration, look up at the middle of the wall.
After finding the door, head back to Gerda and ask her how to get through the door. You must repair Heidi first. You need two buttons, thread, glue, and nails. Pin Heidi from your clues to find those items.
Head back to the Laundry room and use Concentration on the bench’s left and right. This uncovers the two buttons and thread respectively. Go all the way back to the Storage Room (northeast of the Apothecary) to find glue and nails on the table. Use Concentration to retrieve them.

Return to Gerda, then confront Heidi. Choose the following:
- Investigating the Edelweiss
- Gerda’s Testimony
- A note from Professor Becker
Head to the Mind Palace to answer the question “How to get the key to Hell’s Door?” Use the following answers:
- Watson’s successful infiltration (yellow)
- A working dumbwaiter (yellow)
- Heidi’s testimony about Hell’s Door (green)
You now have a third question to answer in the Mind Palace: “How to get to Watson for help?” These are the answers:
- Patient hates the guards (yellow)
- Blocked path upstairs (yellow)
Objective: Get Watson’s Help
Return Maurizio from the earlier scene who mentioned he was Napoleon Bonaparte. Interact with the door and you must use your lockpick. There are six cylinders, and the upward adjustments you need are:
- Two
- Three
- One
- Three
- Two
- Four
You will get a point of no return notice before opening the door. Confirm you are ready and watch the scene.
As Watson, answer how you like. You will end up in the Guest Room with the Sherlock’s Note clue. Pin the clue to bring up the prompts as you investigate. Turn around and you will see a cabinet in the southwest corner. Inspect it, searching the revolver in the bag and the scratches on top of the cabinet. Investigate the revolver’s chamber to put it away.
Leave the room and head left, looking for a door leading to the Director’s Office (there is a sign outside). Go in for a discussion with Professor Gygax, selecting whatever response you like. After the conversation, you will be outside the room with the Very important patient clue. Pin that clue, then return to the Guest Room and head to the right. Head right when the path splits to reach the Administration Room.
Search the Recent photo of asylum staff clue on the desk, flipping it on both sides to register the clue. Turn around and approach a small table in the back, which has the Gygax’s Patient Reports clue.
Go back to the Guest Room and head straight to the centre, going around the birdcage in the middle and continuing straight. You should see Patient Room 2 on your right. Search the desk to find the Patient’s poetry clue. Turn left to find Patient Wolff who you can observe after an introduction.
Observe his head and mouth, along with his left and right hands. Rotate to properly observe each hand. You can decide whether he is Ill, and treatment isn’t working or Ill, due to treatment itself. The correct answer is “Ill, due to treatment itself”.
Head to the Mind Palace and answer the question: “Why does Gygax care about Wolff?” The answers are:
- A note from Professor Becker (blue)
- Character Portrait: Patient Wolff (yellow)
- Gygax’s Patient Reports (green)
This gets you the Very important patient clue, which helps you answer the second Mind Palace question: “How to lure Gygax out of her office?” The answers are:
- Very important patient (yellow)
- Professor Gygax’s testimony (green)
- Gygax’s Patient Reports (green)
Talk to Patient Wolff again and choose whatever options you like to get the A letter written by Becker clue. Go to the Director’s Room and talk to the nurse (Kuntz) outside to deliver the letter. After the scene, go inside the Director’s Room.
Go around the desk to inspect it properly. Search the top left drawer and the brown journal inside to get the Gygax’s Diary clue. Look at the letter opener in the middle of the desk, rotating to view the bottom of the handle. Search the top drawer on the right, then search the envelope for the Letter from New Orleans Bank clue. Finally, investigate the brown stamp under the envelope. Look at the bottom of the stamp to get the Special key clue.
Leave the Director’s Room and head left into the Kitchen. Head northwest to use the dumbwaiter and watch the scene.
Objective: Investigate Hell’s Door
When you regain control, go through the cell door and the path splits to the left and right. Go right to find a small classroom. Search the central small desk at the front of the classroom, using Concentration to inspect the desk and the chains below. Search the table to the left of the blackboard for a Wax cylinder, which you should rotate to properly inspect. Look at the blackboard itself if you want.
Head left down the path split and you will see two doors, one on your left and right. Head through the right door and inspect the desk in front of you. Search the envelope in the centre for A handwritten letter clue, then inspect the Shiny key underneath it. Look to your right to find some paper stuck between book pages to get the A telegram from New Orleans clue. After the inspection, check another desk in the southeast to find the Notebook of Professor Gygax. Use the phonograph machine on top of the desk with the Wax cylinder you found in the classroom.
Go through the door east of the first desk to find an examination chair. Inspect the table to the left of the examination chair, looking at the machine and then the chair itself. You can also examine a bird dissection opposite the chair.
Go back to the two doors and go through the left one, proceeding until you reach a well. Inspect the well, looking at the axe on the left and the well itself.
Return to the room with the examination chair and go through the next door, going down the stairs for a cutscene. Go back up the stairs, back into the room with two desks and wait for an elevator to come down. Board the elevator and turn the crank on the right to go up for another scene.
You are now in the Director’s Room. Inspect Heidi on the table and Professor Gygax near the pillar. Search Dr. Gygax’s eye, her stomach, and the clothes on the right.
Head into the Mind Palace and answer the question: “Where does the evidence lead next?” The answers are:
- A Telegram from New Orleans (green)
- Letter from New Orleans Bank (green)
- A Hand-Written Letter (green)
Speak to Watson to continue after you find the answer.
Chapter 4 – The Outsiders
You get the Banking House of E. W. Gray clue when you start. Pin the clue, then turn right and speak to the sailor standing in front of some sacks to get directions. Turn right and go straight until you reach the Harbourmaster’s Office. Go up to the office and inspect the board to the right of the stairs. Look at the Fine Gemstone poster on the left, and the Missing Person’s Poster in the middle. Look at the rest of the missing person posters in the centre, then to the right to find the ship schedule.
Go around the left side of the Office, turning right and going straight. Look to your right to find a red gate; this is the entrance to Chinatown. According to the directions, the bank is opposite Chinatown, with a man standing in front of the door.

Approach the man and observe him. Look at his head, left hand, and bottom left coat pocket. You can decide if he is a Critical Thinker or Paranoid Fool.
No matter what option you choose after the character portrait, you can’t get in. Turn around and speak to Watson who has just arrived. You get the Mr Frank Barnaby clue, which you should pin.
Objective: Find Frank Barnaby
There is a woman to the left of Chinatown’s entrance who tells you about a shop in Chinatown called Barnaby’s Hidden Gems. She is walking around the area with the tram; she might walk far away if you catch her too late.
Head into Chinatown to register it as a location as you walk forward. When the path opens to the right, go down the path and pay attention to your right. You will see the shop with a rectangular ruby on its sign.
Examine the door and the window to trigger a nearby conversation. Talk to the two men standing nearby to learn Frank Barnaby is at the Giddy Gator in the Creole Corner.
Head past Barnaby’s Hidden Gems and keep going straight to reach the Creole Corner. You will see a sign on the right directing you to the Giddy Gator bar. Go through the doorway and go straight, turning left when the path splits. You will see the Giddy Gator sign, and walk towards it. You should see a man passed out at one of the tables; that’s Frank Barnaby.
Inspect the nearby table, looking at Barnaby and then the Invitation To The Auction in his green vest. After grabbing it, take his yellow hat and green vest.
As Watson, return to the Banking House of E.W. Gray. Talk to the man and you can go inside. Turn left once inside to get The Bank Holds An Auction! clue. Head around the right side and inspect the Plaque With Philanthropists on the right wall. Speak with the clerk in the centre when you are ready.
Ask all the questions, then observe the sheriff who arrives. Look at his hat, the sheriff’s badge on his right breast, medal on his top left vest pocket, his lower left vest pocket, and his right hand. You can decide if he is a Fashionable Menace or a Toothless Dog.
You get the Meeting the Sheriff clue regardless. Leave the building and speak to Holmes, then go back to the boat at the harbour. Watson’s clothes are found leaning over a wooden rail near the ship.
After the scene, head to the Nymph, which is the large ship on your right. Board the boat and go straight, taking the only available staircase up to Door 6. Interact with the door to change your clothes and get the Lucy’s Help clue. Pin the clue and talk to Holmes to switch characters.
Go to the Creole Quarter (fast travel from the map) and head west of the Giddy Gator bar. Speak to a man near a cart and he will give you more precise directions to Champagne. Head northeast and go down the path until you see a giant wooden boat in the middle. Board the boat and head to the right to find Champagne.
After the scene, you get the Opal Trader clue. Head to the Mind Palace and answer the question: “Who is the jewel seller ‘A’?” The answers are:
- Plaque With Philanthropists (yellow)
- Opal Trader (green)
- Banking House of E.W. Gray (green)
You get the ‘A’ for Arneson clue, and must find E. Arneson in the French Quarter. Pin the clue and return to the Harbourmaster’s Office. Talk to a man sweeping outside the building, who tells you that you can take a cab to the French Quarter. Look to the left of the Office to find a cab, where you get a Point of No Return warning. Take the cab once you are ready.
Objective: Find E. Arneson
At the French Quarter, pin the Arneson’s Mansion clue, then head west and then turn right, going straight. When you see a maid outside the gate, you are in the right spot.
Chapter 5 – The Horror At The Door
After speaking to Eulah, you must find another way into the mansion. Head to the right to find the stables, which is the only other path. Use Concentration and examine the locked door and nearby window. Head to the large stable doors and use Concentration on the ground to your left, the flowerpot in the top left, as well as the large doors themselves.
Inspect the flowerpot and search the soil to find the Key to the Stables. Use the key on the locked door, then go through the stables and out the other door. Head around the mansion’s back end to find a back door. Search the floor near the door, then go back down the stairs and inspect the ground near the stairs. Search the footprint in the dirt on the left, and the footprints in the upper right.
Head west of the footprints, continuing all the way until you see a branch on the ground. Use Concentration to inspect the branch, then inspect the nearby bloodstains. Search the fingers in the blood, the footprints near the blood, the handprints northwest of the fingers, and then the footprints to the left of the blood.
Use Concentration and inspect the handprint on the right. Follow the trail of blood to the end of the pier, then inspect the ground. Check the white cloth on your right, then use Concentration to inspect the blood on your left.
You get the Animal near Severed Fingers clue after fully inspecting the fingers in blood, which you can search in the Archives. Use the following answers:
- Class: Mammals
- Order: Carnivore
- Weight: 10-50 pounds
- Habitat: Bayou
This gets you the Chapter 13: Racccons clue. Head back to the mansion’s back door and go inside.
Objective: Find Davey
Head through the door to your southwest to reach the kitchen, inspecting the maid by the table to switch to Watson. Have Watson inspect the maid, looking at her chest, right hand, and the cleaver to her right. This updates the Mansion Crime Scene, where you will reconstruct what happened.
Near the large table in the centre, there is a smaller table by a window. Inspect it, searching the tea cups, the cloth above the right teacup, and use Concentration to search the left chair.
Leave the kitchen and head into the entrance hallway, then head west into the next room. Inspect the man on the ground to switch to Watson, searching his head, right hand, the area near the right thumb, and right pants leg. Look at the painting near the body of Mr Arneson Hunting.
Inspect the nearby fireplace, searching the burnt paper on the left and right for the Burnt Note about Telegram clue. Look for a fallen candlestick near the dining table, looking at the bloodied end. Use Concentration to examine the wooden pedestal left of the fireplace. Inspect the ground west of the pedestal, searching the fallen candlestick, the footprint below it, and the wax drops near the candlestick.
Follow the wax drops to the door, but don’t go in yet. Use Concentration to inspect the ground on your right, and then the footprints ahead of you. Try to open the door to get the Door With a Horse Symbol clue. Head to the right of the door and look on the table for the Letter from Locksmith clue. Head left of the door to find another door with a bell symbol. Try to open it and it will be locked.
Go upstairs to the second floor, going through the door with the sword icon. Inspect the desk, looking at the picture frame, the book in the centre, the newspaper on the right, and the Letter from L in the open right drawer. Flip the picture frame, book, and newspaper to properly inspect them. Inspect the painting to the left of the desk, looking at the man on the left to get Photo Of Hunters.
Leave the sword room and go through a door with two keys on the front. Inspect the table on your right as you come in, looking at the book on the left and the Letter from Lakofka on the right.
You have everything you need to reconstruct the scene. There are seven locations, with the reconstruction order as follows:
- In the kitchen near the maid
- The small table by the window in the kitchen
- The man in the dining room
- The small table left of the stairs
- The rug past the room with the horse symbol
- The area left of the fireplace in the dining room
- The area in front of the dining place
The correct reconstruction images are:
- Maid struggling against wooden figure, who is reaching for a cleaver (first)
- Two people enjoying tea (second)
- Wooden figure attacking man with a dagger-like weapon (third)
- Wooden figure dragging another wooden figure (third)
- Wooden figure holding a dagger-like weapon (fifth)
- Wooden figure dropping candlestick (first)
- Wooden figure attacking with candlestick with dagger-like weapon (fourth)
You get The Horrors Of The Arneson Mansion clue. Go to the Mind Palace and answer the question: “What happened to Davy?” The answers are:
- The Horrors Of The Arneson Mansion (yellow)
- Mansion Crime Scene (yellow)
- Door With a Horse Symbol (yellow)
Head back to the stables where you first entered for a scene, then inspect Eulah. Search her head and then the letter by her left arm. After the scene, examine Davey as Watson. Look at his eyes, chin, chest, left arm, and right pants pocket. You can then decide if Arneson Cared for Davy or Mistreated Davy.
Pin the Mansion Crime Scene clue, then go up the stairs into the bedroom (door with two keys on the front). Search the portrait of Arneson on the wall near the bed, using Concentration on the hand with the ring and the left side of the picture frame. This reveals a button, which you can press to reveal a safe.

The safe’s combination is 1862, from the Mr Arneson Hunting painting. Check the contents, searching the box on the top row and the keys on the bottom. This gets you the Receipt From ‘Lock and Load’ and the Set Of Keys.
Go back to the bell door (left of the Horse room where Davy and Eulah are) and open it with the keys. Search the note on the table to get Telegram from ‘R’, then use Concentration to examine the floor at the foot of the bed.
Examine the pictures on the wall, looking at the southwest and northeast picture. Interact with the clothes on the bed, then interact with the bed itself to reveal a hidden panel. Inspect the panel itself, then examine the journal and opal. This gives you the Collection Of Notes With Instructions and Black Opal clues.
Pin the Letter From Locksmith clue, then go through the door with the sword symbol on the front (the study). Look at the bayou painting on the wall, and use Concentration on one of the lizard’s eyes. Head to the Mind Palace and answer the question: “How can the painting lock be opened?” The answers are:
- Letter From Locksmith (green)
- Portrait of Mr Arneson (yellow)
- Mansion Crime Scene (yellow)
You must now answer the next question: “Where is the ring?” The answers are:
- Chapter 13: Raccoons (green)
- Backyard (yellow)
This gives you the Raccoon Has The Ring clue. Pin that clue and begin looking for the ring.
Objective: Find Arneson’s Ring
Leave the mansion through the back door and head northeast, looking for a small pile of leaves near a small tree. Use Concentration to find traces of a raccoon. Head northeast of the pile, using Concentration to help you trace the small raccoon prints on the ground. This will lead to a tree hollow which you can inspect. Search the leaves, then the Ring With Letter ‘A’ after removing the leaves.
Head back to the painting of the lizard in the study and interact with the eye. This opens another door leading to a secret room. Inspect the desk in the northwest to begin. Search the envelope on the left, the crumpled paper ball in the centre, and the picture frame in the top centre. This gets you the Letter From Northwood Agency, Love Letter from Arneson, and Photo Of Arneson with Lucy clues.
Inspect the northeast cabinet, searching the journal on the middle shelf, the ring box at the lower shelf, and the bottle at the bottom. This gives you the Arneson’s Notes On Bank And Ashmat, Engagement Ring, and Bottle of Champagne clues.
Head to the Mind Palace and answer the question: “How to learn the content of the burnt message?” The answers are:
- Photo Of Arneson With A Boy (yellow)
- Letter From Lakofka (green)
- Arneson’s Notes On Bank And Ashmat (green)
You can also answer the question: “Where is Arneson currently?” The answers are:
- Love Letter From Arneson (green)
- Letter from Northwood Agency (green)
Go back down to Davy and talk to him to get the Cryptic Message clue.
Head back to the French Quarter (fast travel) and speak to the cab driver. You get another Point Of No Return Warning; proceed when you are ready.
Back at the Harbourmaster’s Office, head to the Nymph of Louisiana boat and go to Room 6 to speak with Lucy. Confront her with the following:
- Love Letter From Arneson
- Photo Of Arneson With Lucy
- Engagement Ring
Go back to Champagne in the Fisherman’s Quarter (still on the large wooden boat) to end the chapter.
Chapter 6 – The Call Of The Bayou
You must navigate the boat through this section. Keep going straight, then turn right when you can’t go any further. You will soon see a pier leading to a house, but keep going past it. As the path turns to the northwest, adjust your orientation to continue. You will encounter some path splits along the water; always head through the paths with white lilies.
After turning northwest, take a right on the first path split you encounter. Follow the path through the water, then take another right at the second path split. You should hear a brief scream, but keep making your way towards the torches. Keep following the torches until you reach a group of alligators.
Head back slightly and turn right to find another path illuminated by torches. There is a pier you can disembark at, and just keep following the path with torches on the ground. You will come across a large tree, where Watson asks you to give him the rifle.
Shoot down the three targets quickly, then return to the boat. You can now go past the alligators, following the path. It doesn’t matter which path you take, they all lead to the same pier. Holmes will make a remark, telling you it is the right place to land.
Disembark and keep going forward, using Concentration when you see bloody footprints on the ground. Continue following the path until you reach a giant bonfire, and use Concentration on the ground. There are restraints behind the bonfire which you can use Concentration on, as well as a shrine past the bonfire. For the restraints, examine it twice, searching the cut rope on the lower right and bloodstain on the bottom.
On your way to the shrine, there is a rock near a torch. Examine the blood on the rock, the scratches near the rock, and the footprints on the right. Make your way to the shrine and use Concentration to examine the bloody handprint on the lower right. Examine the top of the shrine, looking at the knife on the left and the bowls on the right.
Go back to the bonfire and head northwest to find a stone alcove near two torches. Use Concentration on the alcove’s lower right, the alcove itself, then inspect the lower left area.
Head northeast of the bonfire to find a cage and some tracks. Look at the tracks, then inspect the cage. Search the vegetables on the left and the hay on the right. Check the wood pile to the right of the cage, the bloody axe, and the nearby clothes on the ground. Inspect the axe itself and the rope on the ground. For the clothes, inspect the blue shirt and the white clothes.
That will give you enough information to recreate the scene. The scene positions are:
- The front of the shrine
- The restraint near the bonfire
- The stone alcove/slab
- The cage northeast of the bonfire
The correct positions are:
- A wooden figure making Arneson drink from a bowl (third)
- A wooden figure slashing near Arneson’s hand (first)
- Arneson being held by a wooden figure while something is in the alcove (third)
- Arneson being dragged by two wooden figures (second)
You now have the Arneson’s Path clue. Pin it and head west of the bonfire. Look for a stone pillar hidden by some vines to get the Bloodied Statuette. Put the Bloodied Statuette on the stone alcove, then go through until you see a small gap at the end. This is the chapter’s Point of No Return, make sure you have done all you can before going through.

Follow the path forward until you reach a path split going three ways. There is a correct path, but it isn’t easy to tell which one is correct. If you look to your right, you will see a giant book. Continually approach it despite the warnings and you can take the Occult Book. This shows you the correct path to take, as it glows white.
You will end up in another area just like in Chapter 2. Head straight and turn right to see a mirror with white lights you can pass through. Head to the right after you are through and look for a white symbol on the ground. Go back to the glowing area and head left, this time looking for stairs you can go down. It leads to an area with another white symbol. Touching both symbols creates a path and solidifies it, allowing you to cross.
You aren’t crossing in this area though; it’s in the area you started in. Remember the path you created, then head back through the mirror and walk over the open space just as you memorised. The areas are mirror reflections of each other, and it might take some adjusting.
When you go through the doorway, you are transported to another area with axes. Before going through them, head to the centre and use Concentration to inspect the blood on the rocks. The three floating rocks will have symbols on them, which you should remember.
You must then use Concentration and find the axes with the matching symbol, and get attacked by them. It’s okay if you get the wrong ones, as long as the symbols on the rocks are filled in. Once all three rocks are glowing, the door opens and you can go through.
Taking control of Watson, follow the same path as Holmes and you find him on the ground. After the scene, head straight to inspect Arneson. Inspect his head, left ribcage, right hand/stomach, and left hand. Your next goal is to heal Arneson.
Objective: Find a way to heal Arneson
Head to the right of Arneson to find two tables. Inspect the table with the most objects, starting with the green Transparent Liquid bottles on the left, the central bowl with Pokeweed Berries, the Amanita Mushrooms on the right, and the Pharmacist’s Handbook behind the berries.
Look up the Transparent Liquid in the Archives. Use three of the four answers:
- Type: Poison
- Consistency: Liquid
- Smell: Odourless
- Colour: Transparent
This tells you that the liquid is Snake Venom. Head to the left of Arneson and examine the table. Search the mixing bowl with an Unknown Decoction on the left, the vase in the middle with Dwale, and the bowl on the right with Salvia Divinorum.
Look up the Unknown Decoction in the Archives. Use three of the four answers:
- Type: Medicinals
- Consistency: Solid
- Smell: Pungent
- Colour: Dark
This tells you that the decoction is Ayahuasca.
Head to the Mind Palace to answer the question: “How can Arneson be sedated?” The answers are:
- Dwale (yellow)
- Snake Venom (yellow)
This gives you the Sedative For Arneson clue. Grab the Snake Venom and Dwale from their respective areas, then interact with Arneson.
As Holmes, leave the area and watch the scene, moving on to the next chapter.
Chapter 7 – The Book From Beyond
As Watson, head to Barnes’ Bookshop to speak to Barnes (you can fast travel from the map). Before you fast travel, head outside and speak to the newsboy to get the Killing Tempest Article. Talk with Barnes and ask both questions, then search the bookshelf to the left of Barnes to get Greatest British Families.
Look up the Cryptic Message to Ashmat in the Archives, using these three answers:
- Location: Scotland
- Period: 1800s
- Achievement: Maritime
This gives you the Stevenson Family clue. Head to the Mind Palace to answer the question: “What is the cryptic message for Ashmat about?” The answers are:
- Killing Tempest Article (blue)
- Barnes’ first look at the book (green)
- Cryptic message to Ashmat (green)
Speak to Barnes about acquiring coastal maps to get a coastal map you can inspect on a desk. It’s between the bookshelves to the left of Barnes. Check the upper left, south, southeast, and east (or any orange lighthouse symbols). This gets you the Barra Head Lighthouse, Skerryvore Lighthouse, Rubha Nan Gall Lighthouse, and the Ardnamurchan Lighthouse clues.
Speak to Barnes and you can choose to leave the book with him or take it with you. Leave the bookshop for a scene. Agree to hear more or mull it over when the options present themselves. You will get the Profile of A. Rochester and the Briefing from Mycroft if you wanted to hear more.
Objective: Briefing from Mycroft
Go straight from Barnes’ Bookshop door and you will see a blue door on your right. This is Hawke’s House, which has no signage to indicate its presence. You only know if you are right if you go up to the correct house. Look at the steps, inspecting the newspaper on the left and the bottle on the right.
Try the door to find that it is locked. Go around the left side of Hawke’s house until you see a blue mailbox and a grated door. It’s unlocked, and you can go through it. The red door is locked, but head right and examine the man in the chair. Check his head, left arm, right hand, and the book on his right leg to get the Unfinished Note Written By Hawke.
Return to Barnes’ Bookshop and report in. You can mention the notebook or stay silent.
Head to the Mind Palace and answer the question: “Who is the cult leader, and what is their goal?” The answers are:
- Profile of A. Rochester (presumed dead) (green)
- Ritual of awakening (green)
- Ardnamurchan Lighthouse (green)
This gets you the Cult’s Plan clue. Return to Holmes and report in. You can tell him that he is mad or not mad. Choose to depart to end the chapter.
Chapter 8 – The Awakening
Head up the stairs and go towards the door. Use Concentration to examine the statues beside the door. Turn around from the door and head down the path, following it into a cave. Look to the right of the cannon to find two objects to inspect. Search the lower ring and the scratches at the bottom, then use Concentration to search the upper circle.
You need a special key for the door. Head out the opening to the left of the cannon, inspecting the body on the right. Examine the head, chest, right hand, and the chain connected to his belt. Head west of the body until you see blood on the ground you can view with Concentration. Northwest of the blood is an area on the ground you can examine. Investigate the marks on the right and the branch on the left (below the Concentration circle). Use Concentration on the grass on the left to finish.
Pin Ashmat’s Body, then head to the right to find two spots to use Concentration on. The left side has the Occult Medallion, which you need for the door.
Return to the door and use the Occult Medallion, though you can see some blood on the stone walls to your right on your way to the door. Inspect them with Concentration if you wish.
Once inside, follow the path and head right when the path splits. Look to your right to find a table with two halves. Continue onward to the torch and you will see an empty bucket that needs blood. Return to Ashmat’s body to get Ashmat’s Blood, then return to the bucket. Pull the lever next to it, but it won’t work properly.
Inspect it a second time to have Watson hold the lever in place. Return to the path split and head left, approaching the circular stone in the middle. Go around the left side to find another lever, which triggers a scene.
As Watson, investigate a new stone pillar with a small circular crank nearby. This switches back to Holmes, with four pillars appearing nearby. Use Concentration on the southeast pillar to learn they have holes. There are bones around the area which you can use to plug the holes. There are two for each pillar, but there are more than enough. Scan the area to reveal the locations of the bones. Once all pillars are plugged, inspect the chest that appears from the circular stone.
Take the contents and head east of the circular stone, where Watson is standing near a pot. Put the contents of the chest in the pot, which allows Watson to grab Ancient Coins. Return to the table with two halves and put the coins on the empty half. Return to the lever near the bucket and pull it to continue.
Continue following the path, calling out to Holmes occasionally. Holmes’ position will be revealed by blue sound waves every time you call out to him. Follow the sound waves; if you don’t see them, you’re going in the wrong direction. You may need to call more than once before Holmes responds. Look around you when he calls as you might miss the sound waves.
Once you find Holmes, watch the scene, then follow the path once you regain control. You will come across a table near a person. Search the table, inspecting the keys on the wall and the book on the table. This gets you the Lighthouse Keys and the Lighthouse Keeper Diary – May 3rd.
Use the keys to open the door to the next room, where a device is pointing a red laser against a pillar. Investigate the blue light near the group of people and the laser device, then continue down the staircase. There is a red table you can search at the bottom. Search the blue lens on the left, the obsidian stone next to it, another blue lens in the northwest, and the Warning To Ashmat From R. note at the bottom.
Head to the Mind Palace to answer the question: “How to interrupt the hypnosis from the lens?” The answers are:
- Obsidian Dagger (blue)
- Strange devices with beams (yellow)
- Entranced people (yellow)
- Warning to Ashmat from R. (green)
Head to the laser devices and align the beams towards the blue lens. Interact with the lens to break it, then head through the door they were blocking.

Follow the path to a scene that plays. When it ends, shoot the gun out of the gunman’s hands (the target should appear shortly before the gun fires). If you fail, you can always try again.
Head into the next room after disarming your assailant. It will have two doors, one small door to the north and a large one to the east. You can’t go through the east door yet as you need a plan. Head north and inspect the open shipping container. Search the container lid behind the container, the hay inside, and the Lighthouse Keeper Diary – April 4th to the right.
Look at the nearby table, searching the left and right sides of the Ardnamurchan lighthouse plans, then the Ashmat’s Scribbles book on the table. For the left side of the plans, look at the top and bottom parts of the lighthouse.
Head to the Mind Palace to answer the question: “How to stop the ritual?” The answers are:
- Obsidian Dagger (blue)
- Khaleid lenses’ weakness (yellow)
- Modified Lighthouse Lantern Blueprint (green)
This gives you the Sabotage Plan and allows you to go through the doors. Going through the doors is the Point Of No Return; save and go through when you are ready.
As Holmes, move forward to trigger a scene. This switches control to Watson. Go around and aim two beam emitters towards one lens at a time. Once two lasers energise the lens, you can break them. One laser must be aimed through a tiny gap in the machines, but it will still register.
During Holmes’ confrontation with the culprit, you must answer “I saw other worlds.” Other options cause you to fail, while the correct option allows you to continue breaking lenses. Watson must move through a group of cultists to reach the next set of emitters, press the right buttons to avoid being thrown off.
With the emitters, you must rotate them and move mirrors around to target the lenses properly. After aiming two of the lasers with the proper alignment, head to the right and look for a broken emitter with one crystal. Examine it, then continue going around until you see an emitter with only two crystals.
Take the crystal from the broken emitter and fix the second emitter with two crystals. This allows you to turn that emitter towards another lens, giving you two crystals to break. You can only break one of them for now before the scene switches back to Holmes.
Answer “I’m afraid of losing my mind” to switch back to Watson successfully. Make your way through the next crowd of cultists, then go through a second crowd of cultists to reach a single emitter. Aim that towards the lens, make your way back again, and then aim another emitter towards the lens. Break the lens to proceed.
Answer “It’s all real” to return to Watson. Make your way through a group of cultists, then align the last two emitters to break the final lens. This completes the game, and you can replay to grab anything you missed.
Well done detective, you’ve cracked the case of The Awakened. Please let us know in the comments what you think about the game and if this guide proved useful.